If you would like to use PayPal outside of our built in integration, you have the option to link your personal PayPal buttons to your course landing pages for accepting payment.
You must be on PayPal Business to set up this option.
In this article:
How to Create a Custom Button in PayPal
How to Add a Button to Your Course Landing Page
How to Remove Your Default Buy Buttons
How to Direct Buyers to a Desired Page After Payment
How to Enroll Students After Accepting Payment
How to Create a Custom Button in PayPal
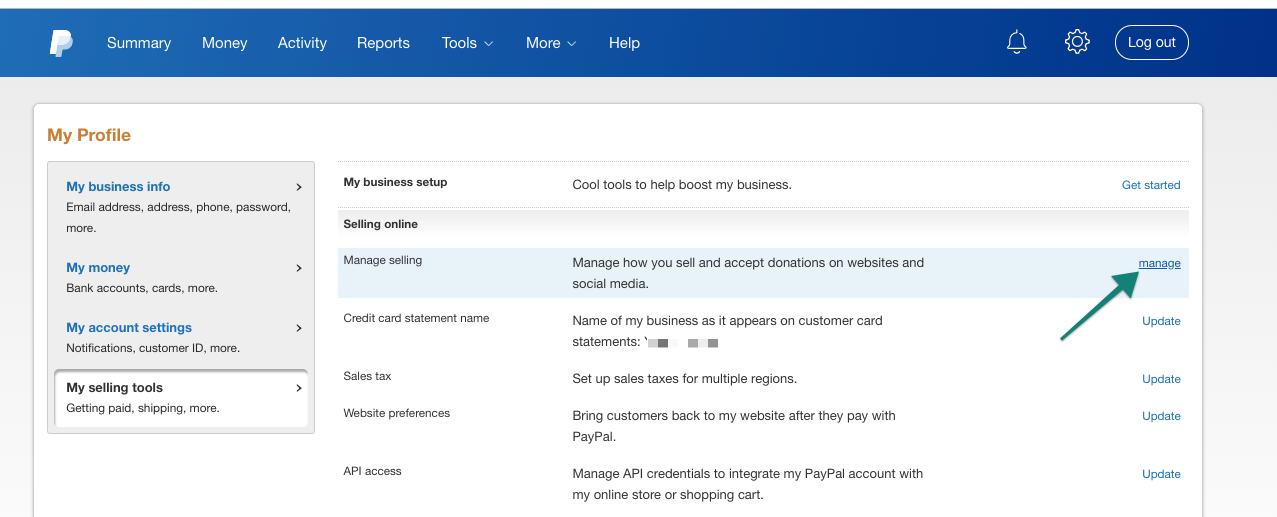
- In your PayPal dashboard, click on the gear icon in the top-right corner to enter the Settings area of your PayPal account.
- Navigate to My Selling Tools and click on Manage Selling.
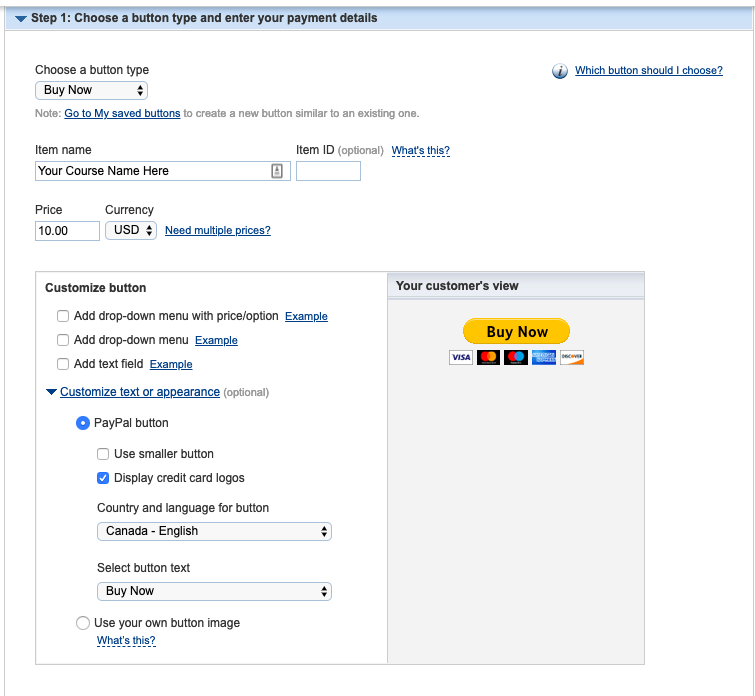
- On the next page, select Create new button to start creating your new direct to PayPal purchase button.

- When creating your button, select a Buy Now button.
- Enter an item name that corresponds to the course or product name you are creating the button for on your Thinkific site. This will be what is shown on the receipt received by your student, and on the purchase summary in your PayPal dashboard.
- (Optional) setup an Item ID for tracking purposes.
- Before creating your final button, you can customize the text & appearance of the button from this page.
How to Add a Button to Your Course Landing Page
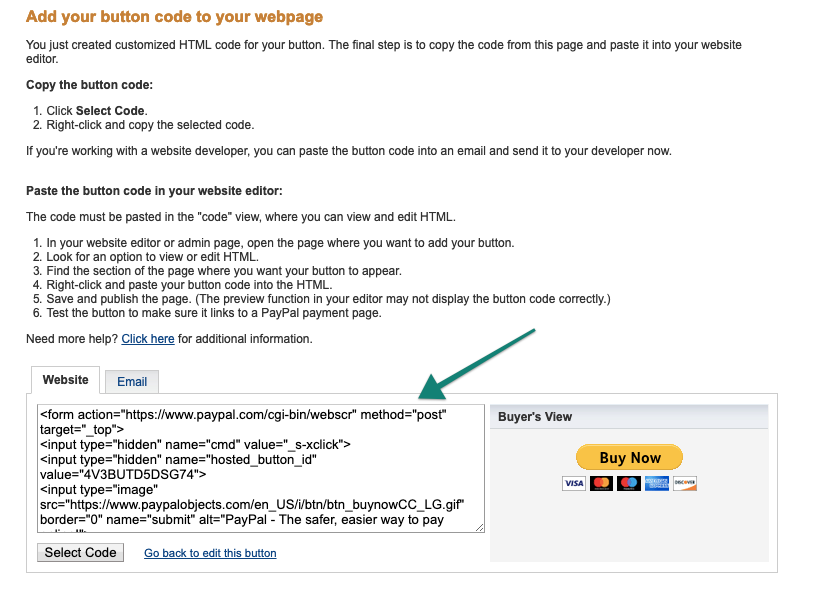
- Once you've created a Buy Now button in PayPal, copy the entire block of code provided by PayPal.
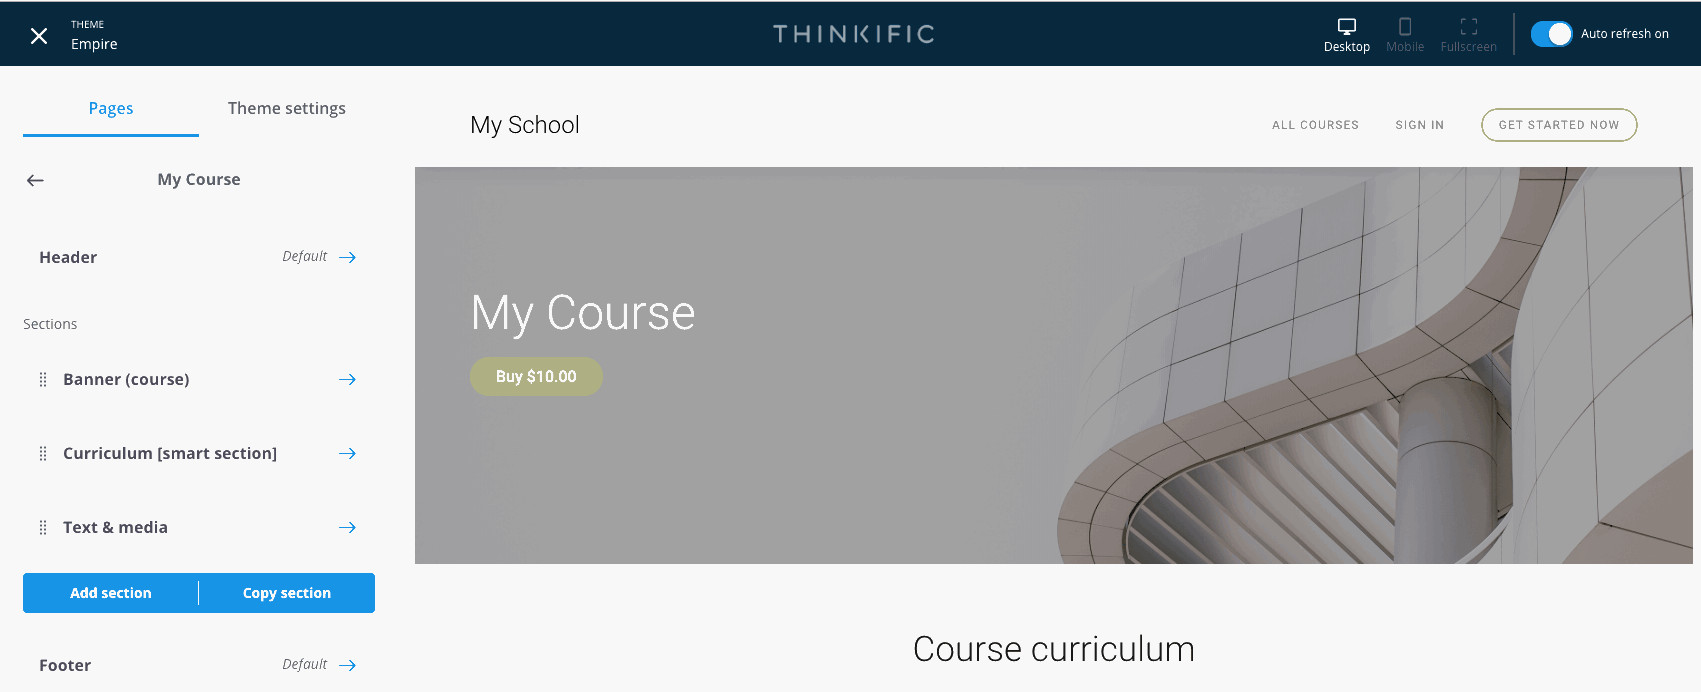
- Back in Thinkific, go to Manage Learning Content
- Select Courses
- Click on the course you want to add the PayPal button to
- Click Build Landing Page on the top right to open that page in Site Builder
- Add a Text & Media section, and switch to code view using the "" symbol in the tool bar.
- Paste the block of code from PayPal while in code view, and switch back to normal view using the same "" symbol to preview the final button.
- Click Save to apply changes.

How to Remove Your Default Buy Buttons
Once you have added a custom button, you will want to make sure to remove the default Buy buttons on your landing pages. Remove your default Banner buttons by:
- Navigate to your Banner
- Select Hide default buttons (product pages only)
-
Save to apply changes.
- (Optional) If using the Vogue theme, also hide your Header buttons and Save to apply changes.
- Remember to remove any Pricing sections that you will not be using, by deleting the section.

How to Direct Buyers to a Desired Page After Payment
Once payment is accepted on Paypal, you may want to send students to a confirmation page, so they know their payment has been processed and what their next steps are. This can be a custom page that you've setup on your Thinkific site, or to any landing page of your choosing.
You can setup this preference through your Paypal settings by:
- Navigate to the Website Preferences option:
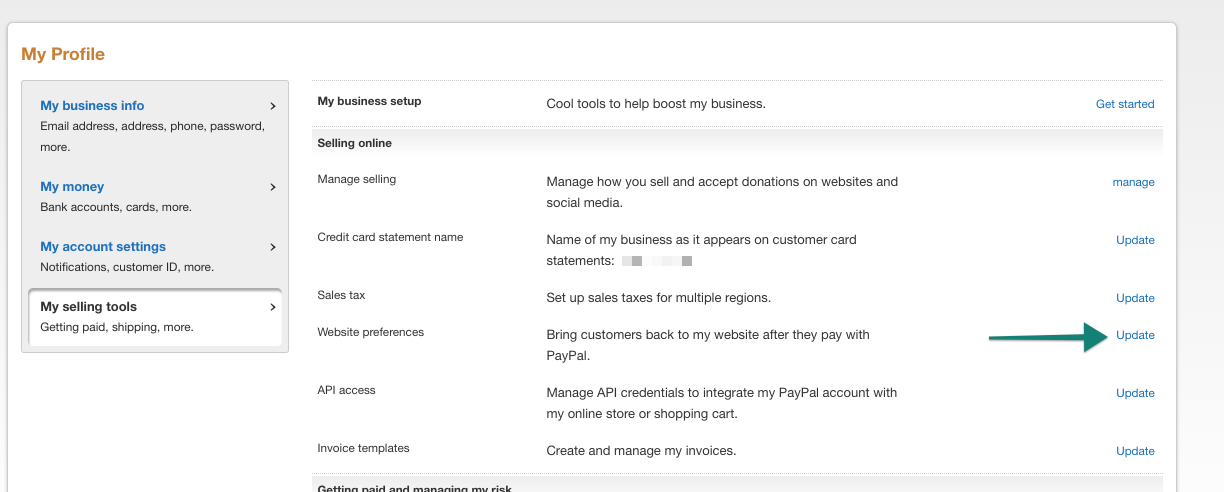
- Under Website preferences, choose a URL that students will be returned to once they complete a purchase on your site.

How to Enroll Students After Accepting Payment
When accepting payment via PayPal using a custom button on your landing page, you will be bypassing our built in checkout and will need to enroll students into the appropriate Thinkific course after accepting payment. There are a few options for enrollments:
Use Zapier to Automate Enrollments
For the simplest solution that does not require a 3rd party or developer support, we recommend manually enrolling students or issuing Coupon Codes.
Manually Enroll Users
This involves manually creating the user in your Thinkific account and enrolling them into the appropriate course. You can see instructions on that here: Create and Enroll Users
Issue Coupon Codes
Once you have accepted payment outside of Thinkific, you can direct users to the built in checkout with a 100% coupon applied. This will allow the student to set up their own account and automatically enroll in the course. If you would like to create a link to your built in Course Checkout with a 100% off Coupon automatically applied, you can do as follows:
- Create a Coupon with your desired settings
- Make note of the Coupon Code you created. For example: 100off
- Copy the URL to your Checkout. It will be formatted like https://yoursite.thinkific.com/enroll/313872?price_id=324145
- Append your Coupon Code to your Checkout URL in the following format: &coupon=CODE
- You will now have a URL formatted as follows: https://yoursite.thinkific.com/enroll/313872?price_id=324145&coupon=100off
This URL can be shared with students who have accepted payment outside of Thinkific to allow them to create a profile and enroll into your course without paying any additional fees. You can consider sharing this in an email once their payment has been processed for example.
Use Zapier to Automate Enrollments
If you would prefer to automate enrollments, you can use Zapier. Zapier allows you to perform an action in one application (ex. Enroll a student into a course in Thinkific) based on a trigger in another (ex. Payment processed in PayPal).
Build a custom solution using our Public API
If you have a developer available, you can create a custom solution using our Public API to automate enrollments after a payment has been processed.