Looking to move from Accredible Certificates to Thinkific Certificates? Follow the steps below to ensure your transition is seamless!
In this article:
Design Your Thinkific Certificates
Assign Your Thinkific Certificate to a Course
Overview
Thinkific Certificates lets you create beautiful, on-brand certificates, plus manage the student experience right from your Thinkific dashboard. Similar to Accredible, Thinkific Certificates are issued when a student reaches 100% completion in your course.
Certificates are assigned per course, which means you can take your time transitioning from Accredible to Thinkific Certificates. You can customize your Thinkific Certificates to make sure they are on brand and ready to go before you turn them on!
Design Your Thinkific Certificates
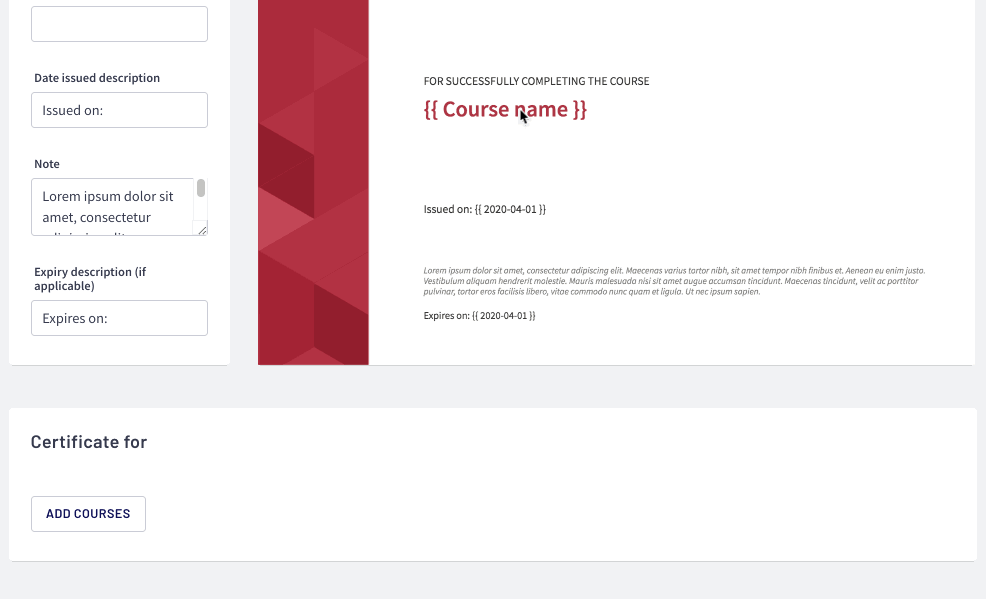
First things first, you'll want to start designing your Thinkific Certificates. Certificates can be assigned to one or more courses and will auto-populate variable details like student name, course name, custom fields, as well as completion and expiry dates.
Depending on your needs, this means you can either create a single Thinkific Certificate and assign it to multiple courses in bulk or you can create unique Thinkific Certificates per course!
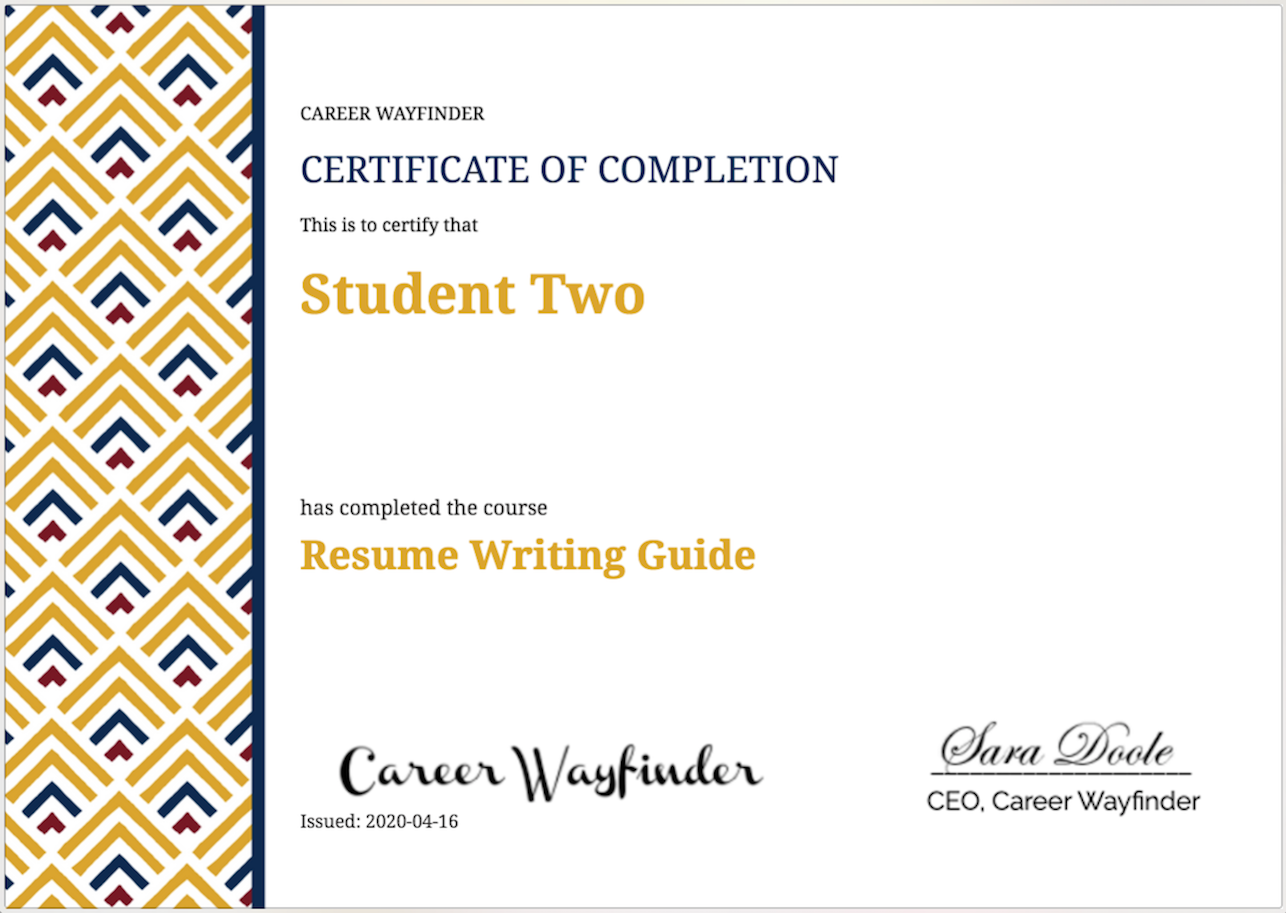
Although your certificate in Thinkific won't look identical to Accredible, there is a lot of flexibility in customizing your background image, colors and more! Here's a great example of what you can achieve using a custom background image in Thinkific:
| Accredible Certificate | Thinkific Certificate |
 |
 |
Check out the following articles for how to start designing your Thinkific Certificates:
Customize Your Certificate Content
Customize Your Certificate Design
Assign Your Thinkific Certificate to a Course
Once you are happy with your design, you can assign you certificate to a course in your certificate settings or in your course settings.
How to Assign a Certificate in Your Certificate Settings
- Go to Support Your Students
- Select Certificates
- Click on your desired certificate
- In your certificate settings, scroll down to the bottom of the page
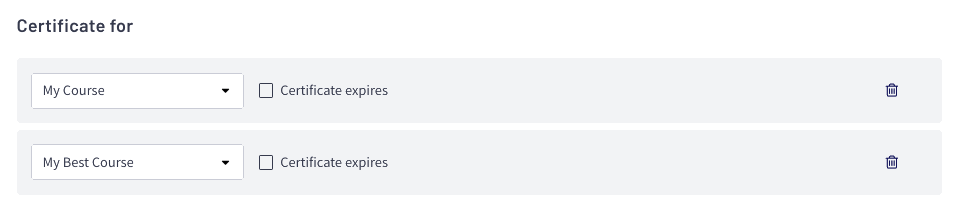
- Under Certificate for, select Add courses
- Note that when assigning courses to your certificate, you will be able to see if they are currently linked to Accredible under the Vendor column before making your update:

- You can then make your selection and click Add courses
Optional Expiration Settings
If you would like to set an expiry for your certificates, this can be done per course by checking off Certificate expires. You'll have 2 options and make sure to click Save on the top right once you have applied an expiration!
- Select After period of and input a number of days. For example, if you input 365 days, the certificate will have an expiry date that is one year after the certificate is issued.
- OR select On a certain date in the dropdown menu and select a calendar date
How to Assign a Certificate in Your Course Settings
You also have the option to assign a certificate in your course settings. We only recommend this option if you don't need to assign the same Thinkific certificate to multiple courses at once.
- Go to Manage Learning Content
- Select Courses
- Click on the course you want to edit
- Select the Settings tab
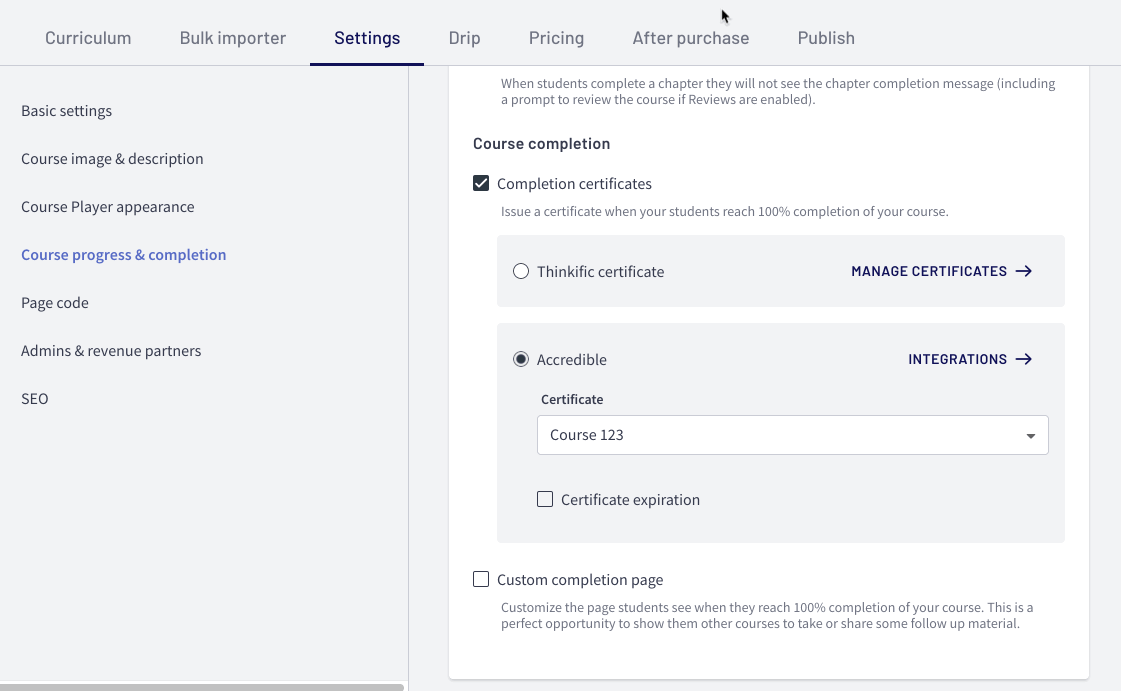
- Select Course progress & completion on the left menu
- Under Course completion, make sure Completion certificates is checked off
- Select Thinkific certificate
- Under Certificate, select the Thinkific certificate you would like assigned
- Optional: Check off Certificate expiration and adjust your settings as desired
- Click Save on the top right
What's Next?
Once you have assigned your courses to Thinkific Certificates, students who complete the course going forward will receive Thinkific Certificates!
You can learn more about managing and viewing issued certificates here: Managing Thinkific Certificates
Frequently Asked Questions
What’s happening with Accredible?
Going forward Thinkific Certificates will be included as part of Thinkific plans rather than Accredible. Today, we’re launching Thinkific Certificates and letting you access this new tool so you can build and manage your certificates right in Thinkific.
Later this year we’ll be migrating away from including Accredible as part of Thinkific plans. We’d initially planned to launch now with a firm date for migration, but given everything that’s going on in the world we wanted to give a little more time. We’ll make sure to give you lots of notice (90 days) when this is going to happen so you have time to prepare.
I’m happy with Accredible. Can I stay with them?
Sure! If you’re happy with your Accredible certificates you can set up a paid account with them and continue to issue your certificates exactly as you do today. Learn more.
What about my existing Accredible certificates?
All of your existing certificates are already paid for and can continue to be accessed on Accredible. Your login details can be found on your Integrations page.
Will students continue to be able to access Accredible certificates from their Student Dashboard?
Students who already have had Accredible Certificates issued will still be able to view their previous certificates as well as new Thinkific Certificates going forward. They can access their certificate from clicking Get your Certificate directly within the course or from My Account, Certificates while they are logged into your site!
As the Site Owner or Site Admin, you can also always access previous Accredible certificates from within your Accredible account. If you would like to see if an Accredible or Thinkific Certificate is linked to a particular student, you can simply view their user profile in Thinkific like this: How to View a Student's Certificate.
More About Thinkific Certificates
Customize Your Certificate Content
Customize Your Certificate Design