MailChimp is a marketing automation platform and an email marketing service. Thinkific has a Mailchimp app that supports sending students to one Mailchimp list. Zapier is helpful if you want to extend the functionality like sending students into multiple Mailchimp lists or perform other actions.
Using Zapier to Subscribe a New Thinkific Student to MailChimp
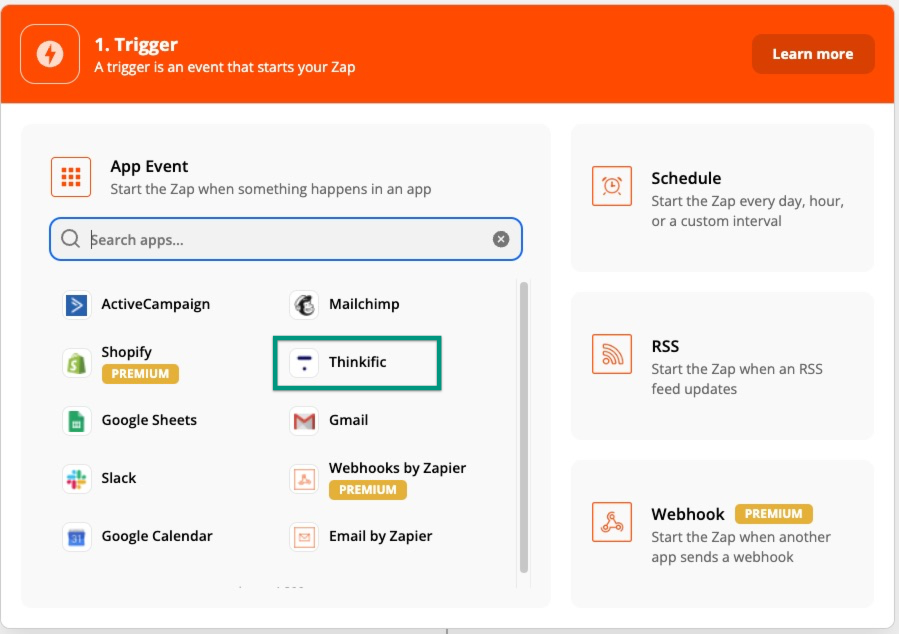
- Create a new Zap and select Thinkific as your Trigger:
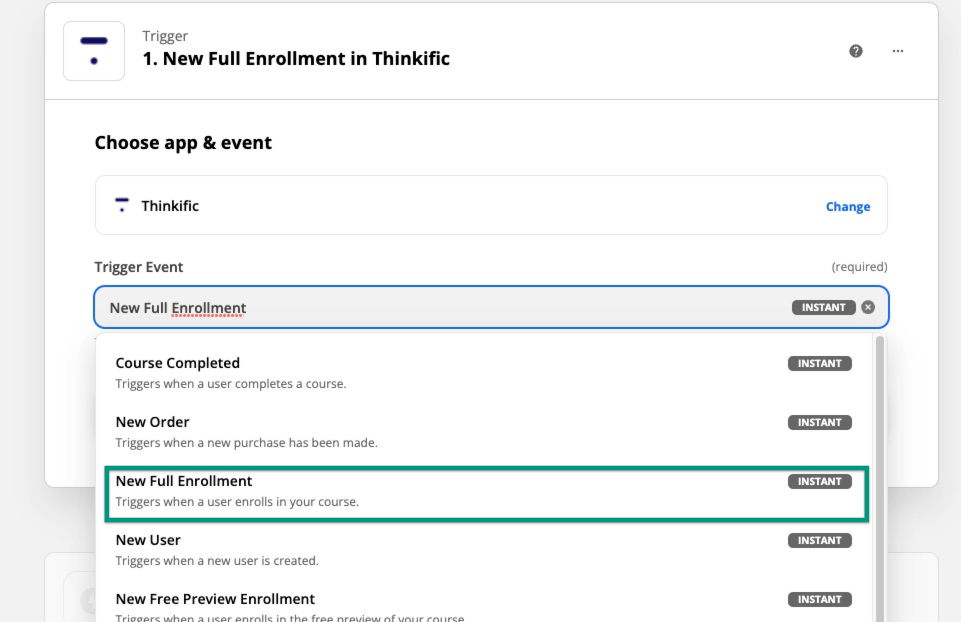
- Select the relevant trigger, in this example, New Full Enrollment, then Continue:
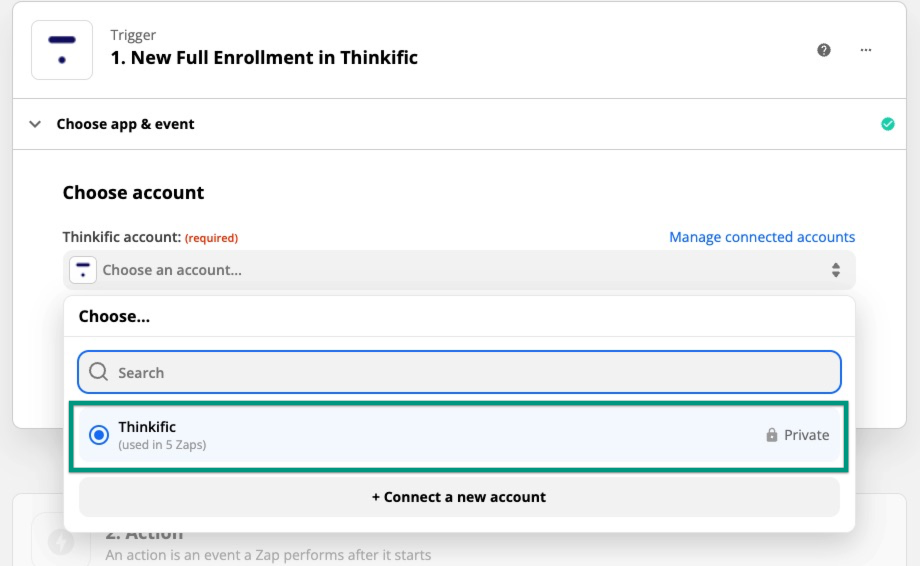
- Connect and select your Thinkific account, then Continue:
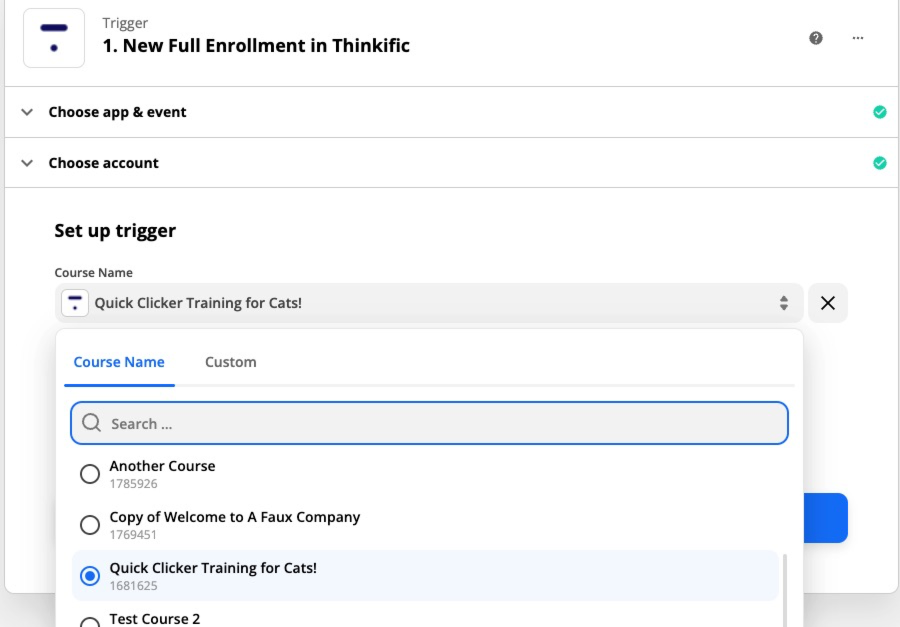
- Select the course or bundle name that you want to trigger the Mailchimp action, then Continue:
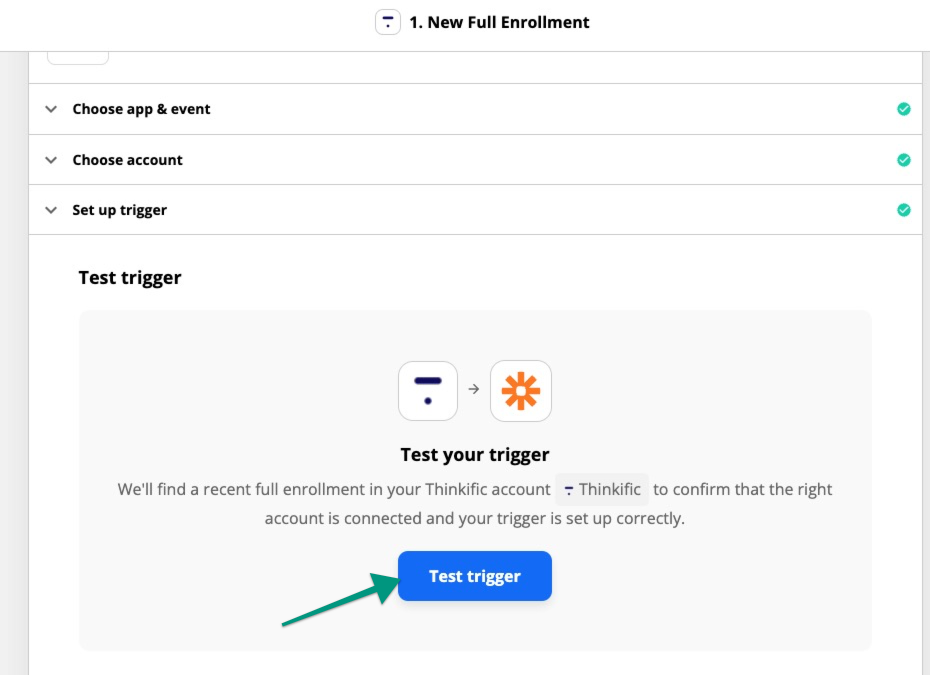
- Test the trigger:
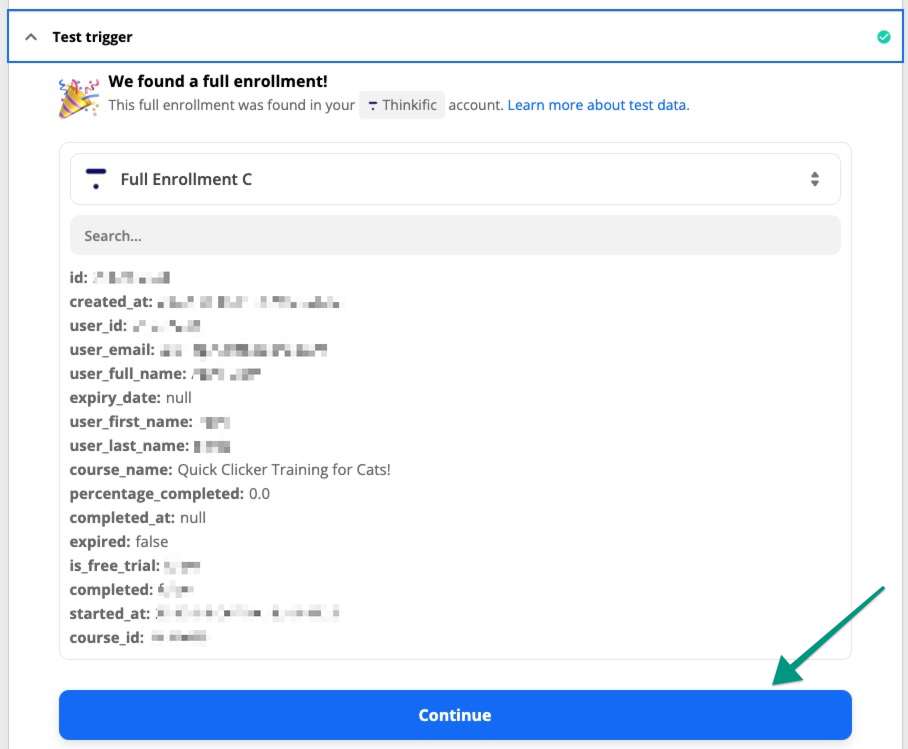
- If your test comes back successful, your trigger is good to go. Click Continue:
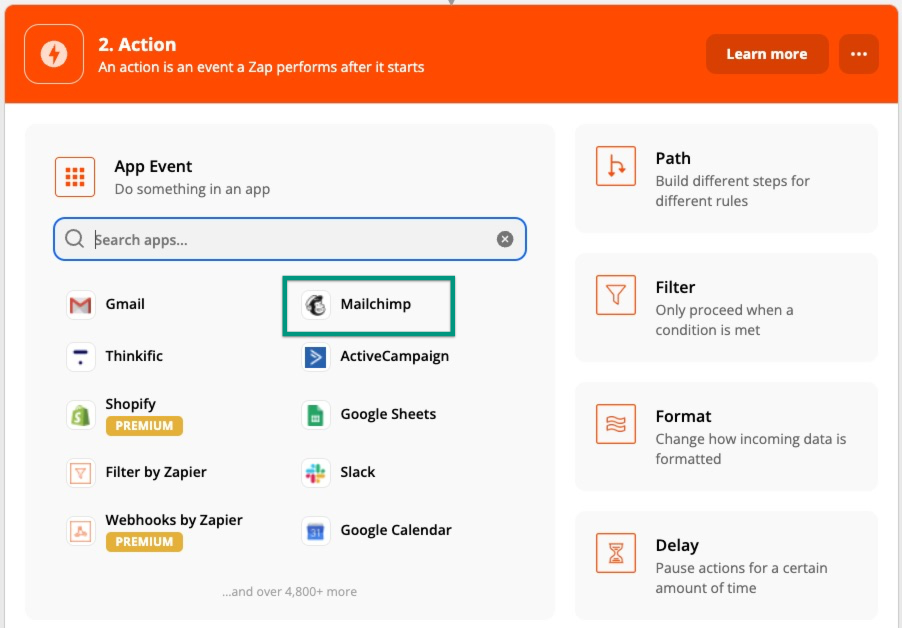
- Now that you have your trigger set up, create your action. Under Action, select MailChimp, then Continue:
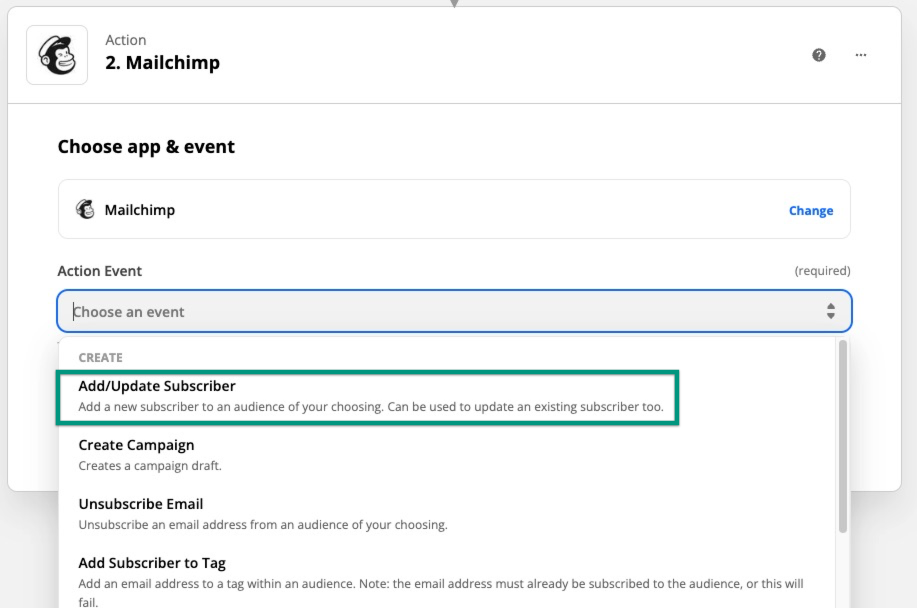
- Choose the relevant Action (in this case, it would be Add/Update Subscriber), then Continue:
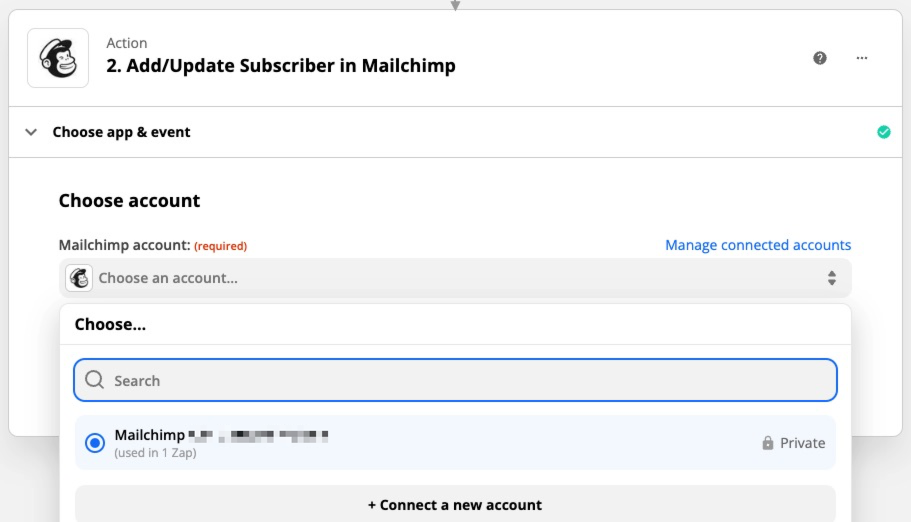
- Connect and select your MailChimp account, then Continue:
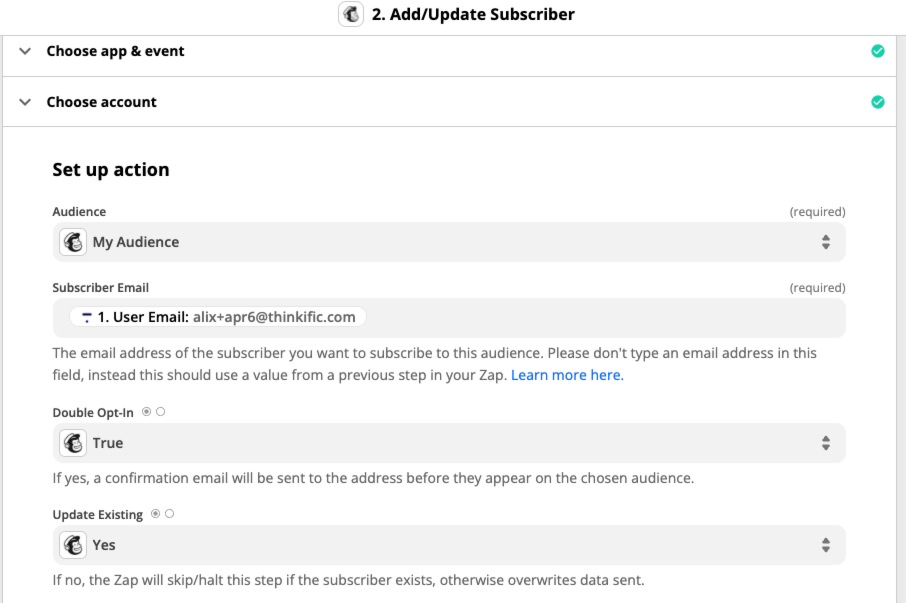
- From the dropdown menu, select the audience you want the student to joinr when signing up to your Thinkific course. You will also need to add your subscriber email address (it is passed from your Thinkific account). Add any other optional relevant MailChimp fields that apply, then Continue:
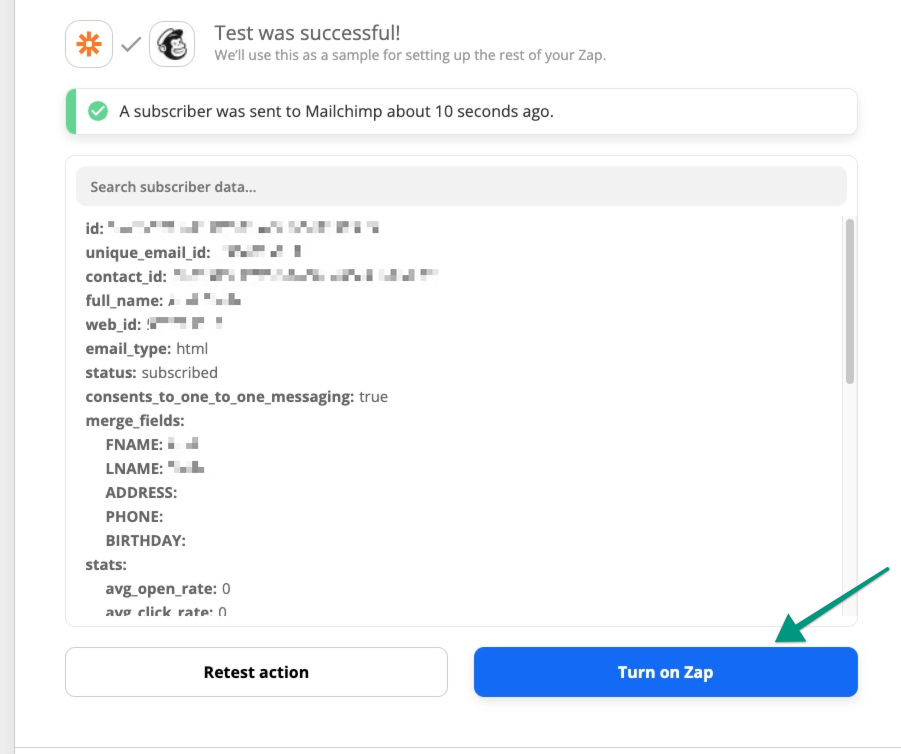
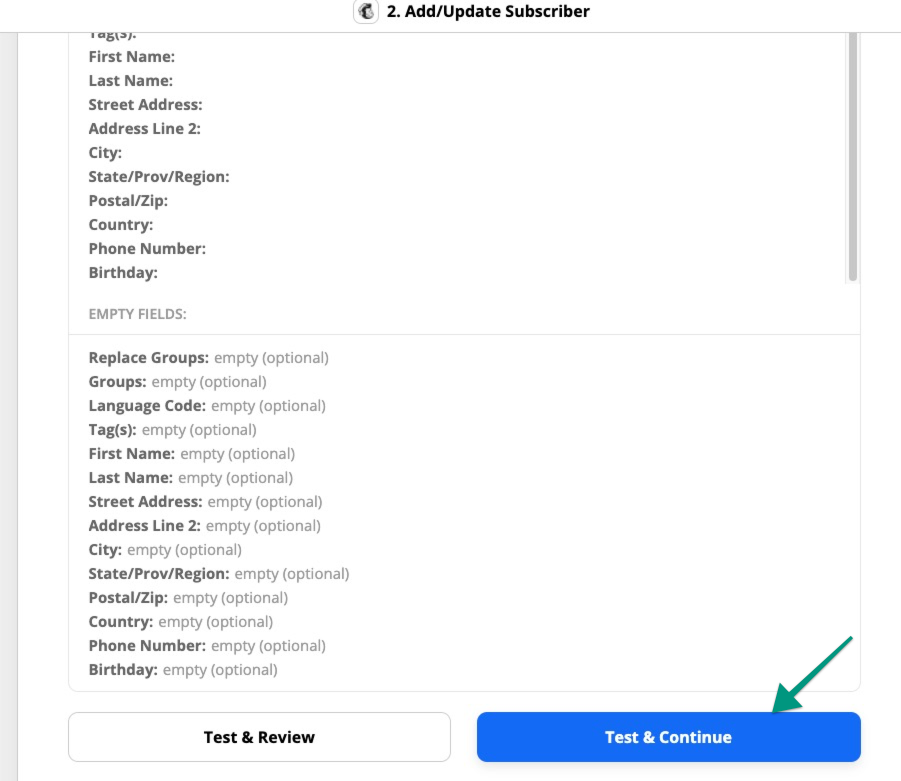
- Test this step to ensure it comes back successful:
- Then, turn on your Zap and you're finished!