The Infusionsoft by Keap app allows you to take payment for a course or bundle via Infusionsoft's checkout system and have your customers be automatically enrolled in that product in Thinkific. In addition, you can unenroll students automatically if there's a failed payment.
Keap/Infusionsoft recently updated their application with a new interface and navigation. As part of this update, they split existing Infusionsoft users onto a 'Max Classic' version of their software, which maintained the previous interface. This article is written for the Max Classic interface.
If you have created your Keap account after February 2021, you are likely on the updated version of the application. We are in the process of updating our documentation to match these changes.
In this article:
Enroll Your Student Upon Successful Payment
Unenroll Your Student Upon Failed Payment
Enroll Your Student Upon Successful Payment
- If you haven't already done so, the next step is to create a Product in Infusionsoft for the course or bundle that you'd like to sell. Find Infusionsoft's instructions for that here
-
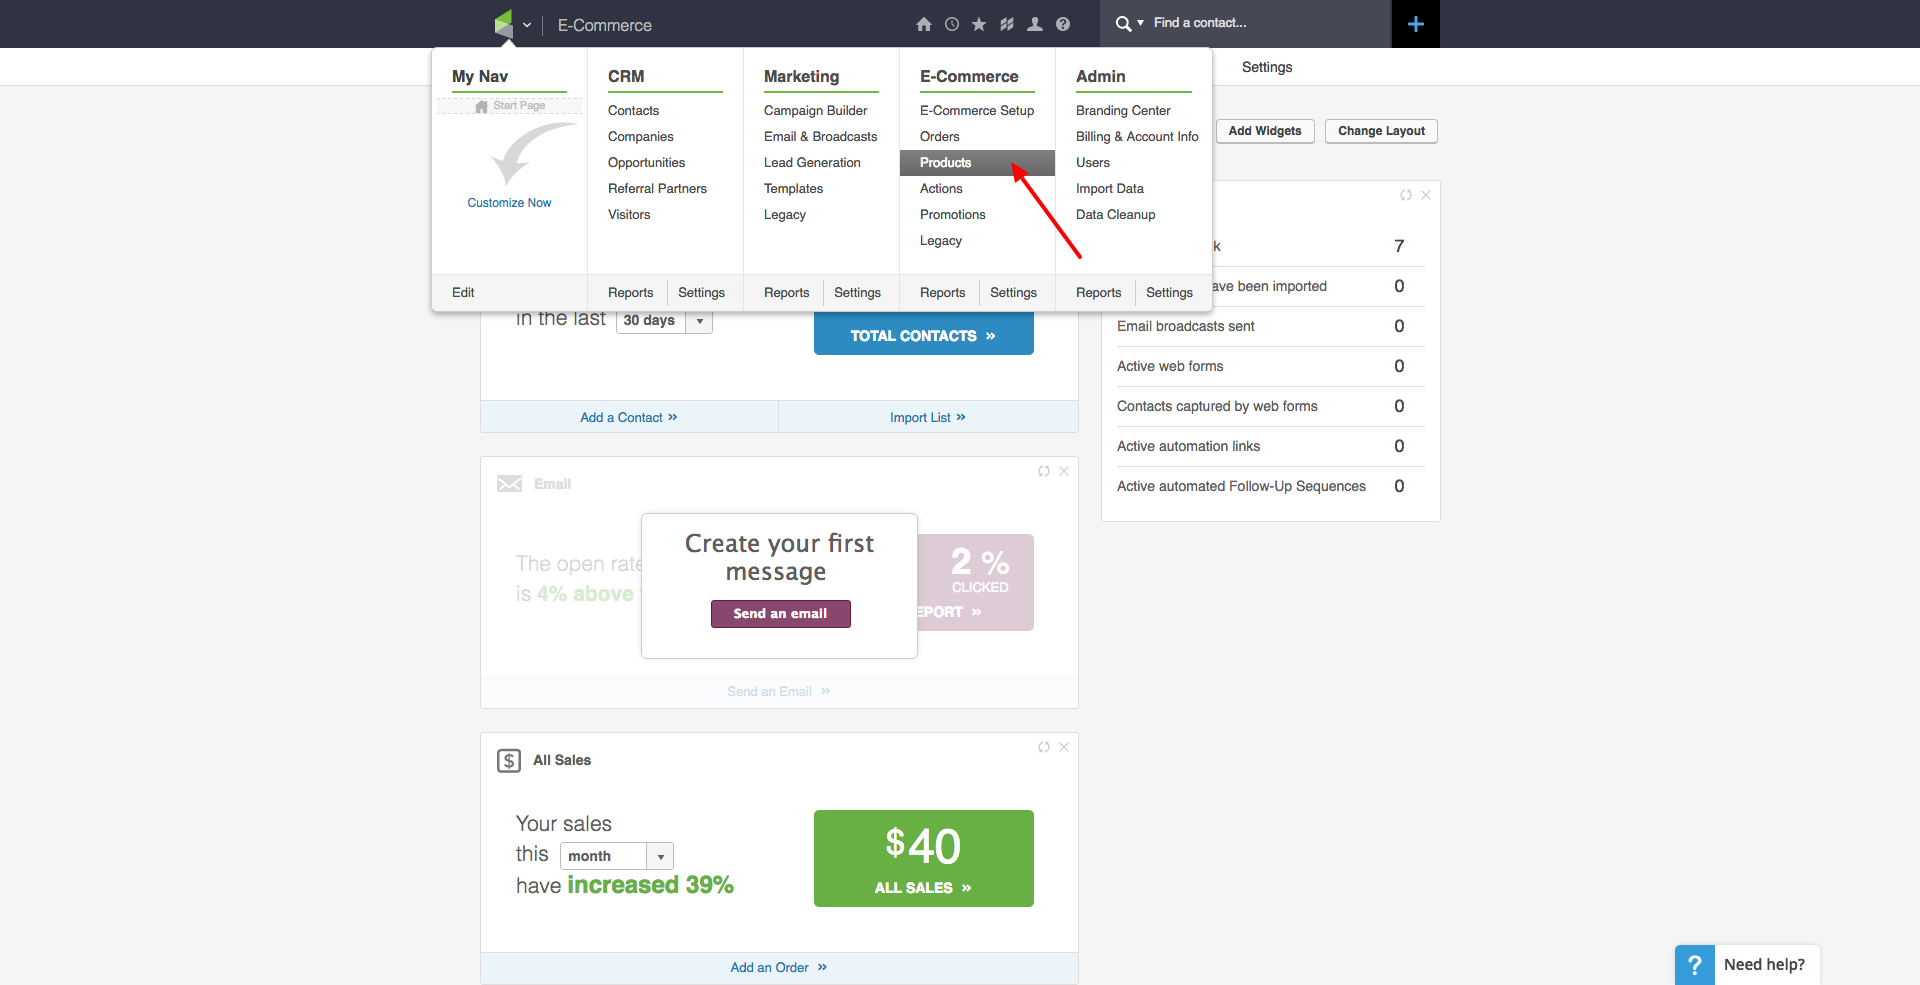
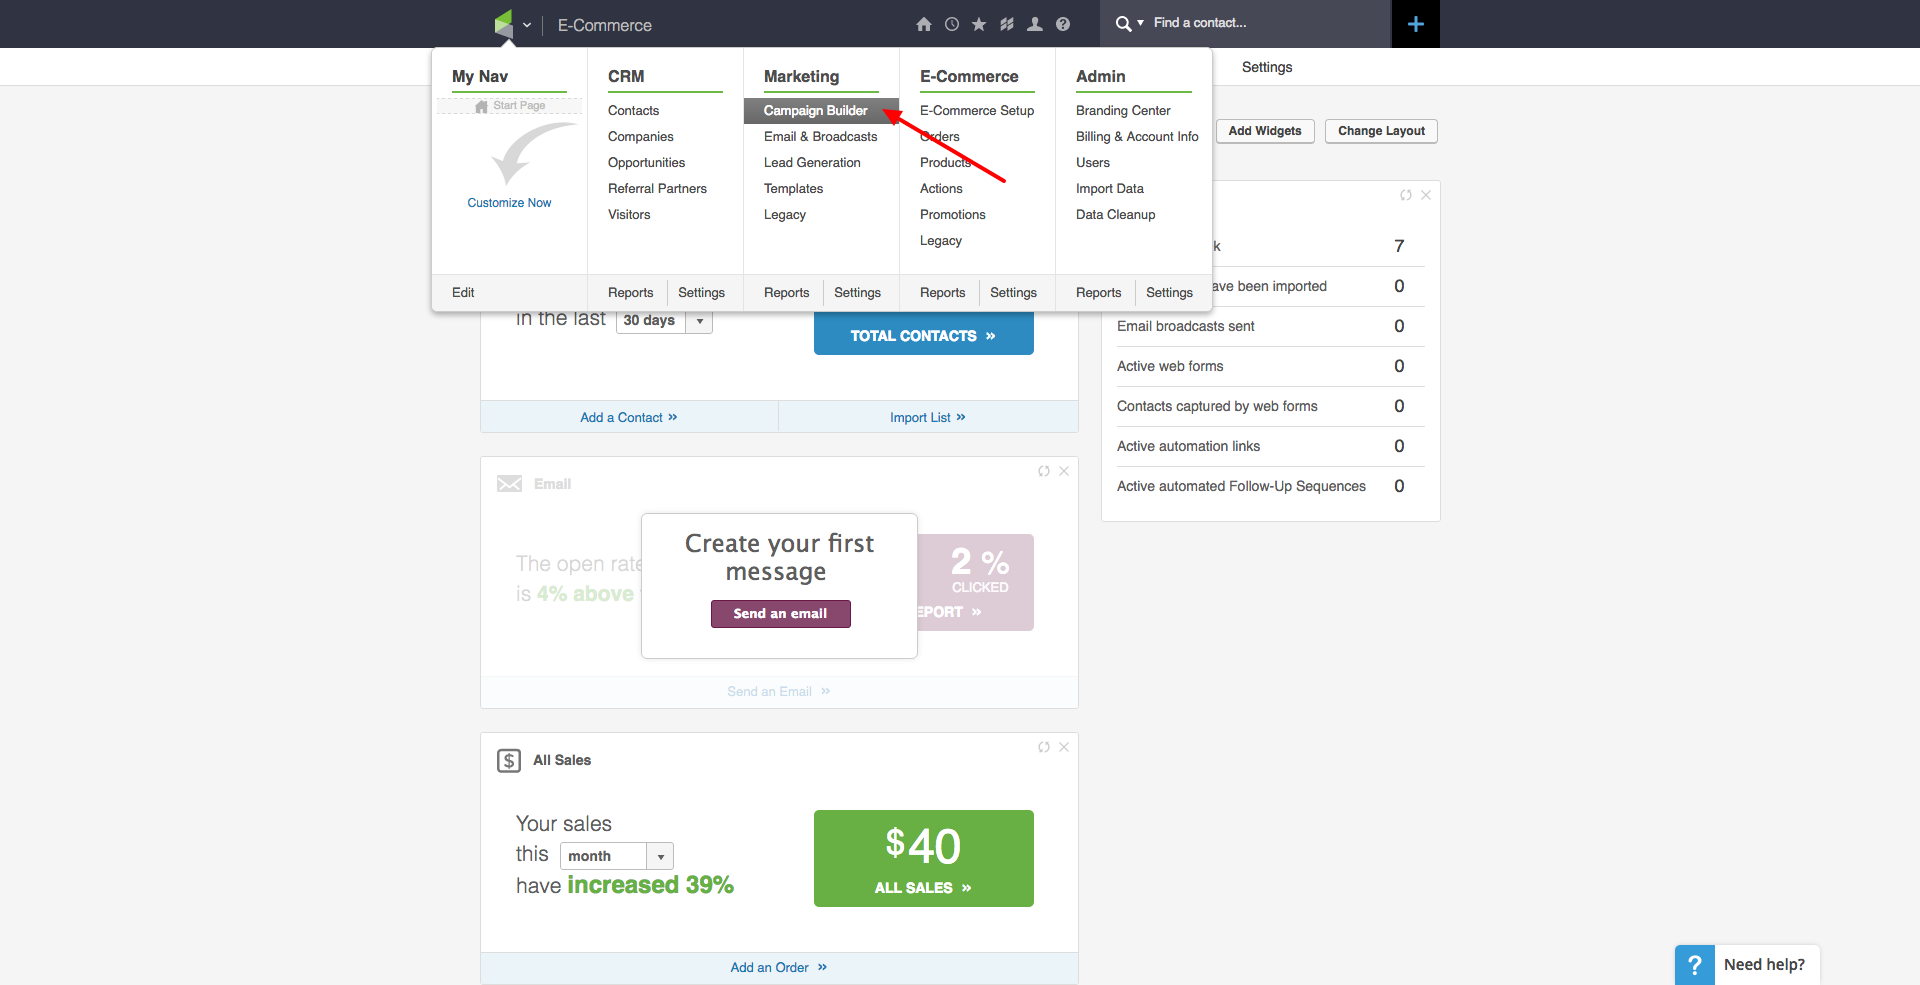
Once your product is created and ready to be sold in Infusionsoft, head to the Campaign Builder
-
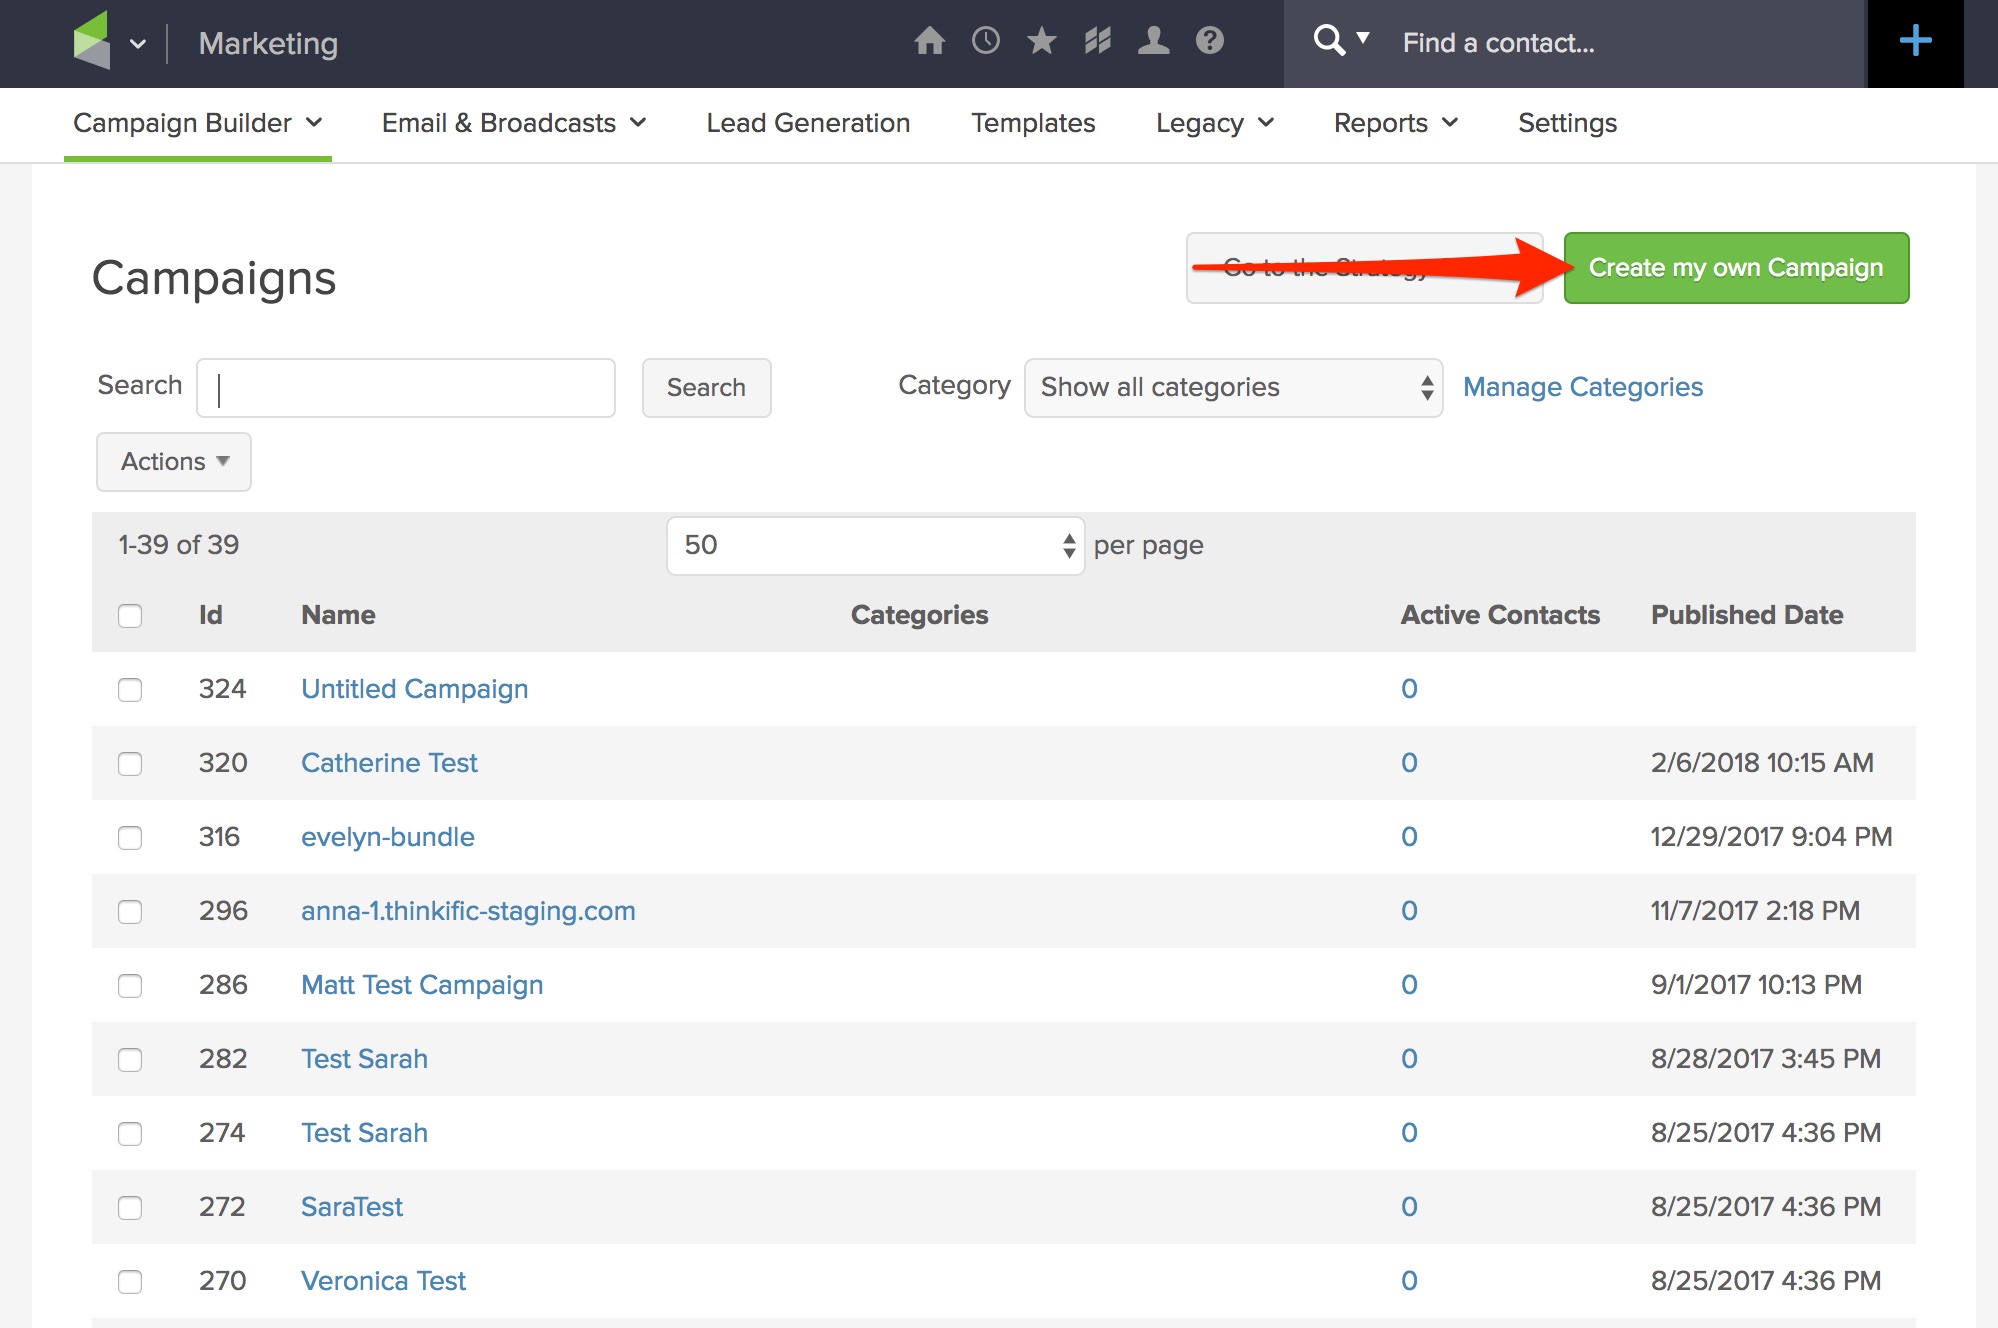
Hit the Create a Campaign button, give it a name, and then Save.
-
Create a goal and configure the purchase
Next, create a goal by clicking and dragging the Product purchased goal onto the page. Then, double click on the icon to configure the purchase. Select Specific Product Purchase, then choose the product you just created, then click Save (the shopping cart on the Goal symbol should now turn green to confirm that it's been configured).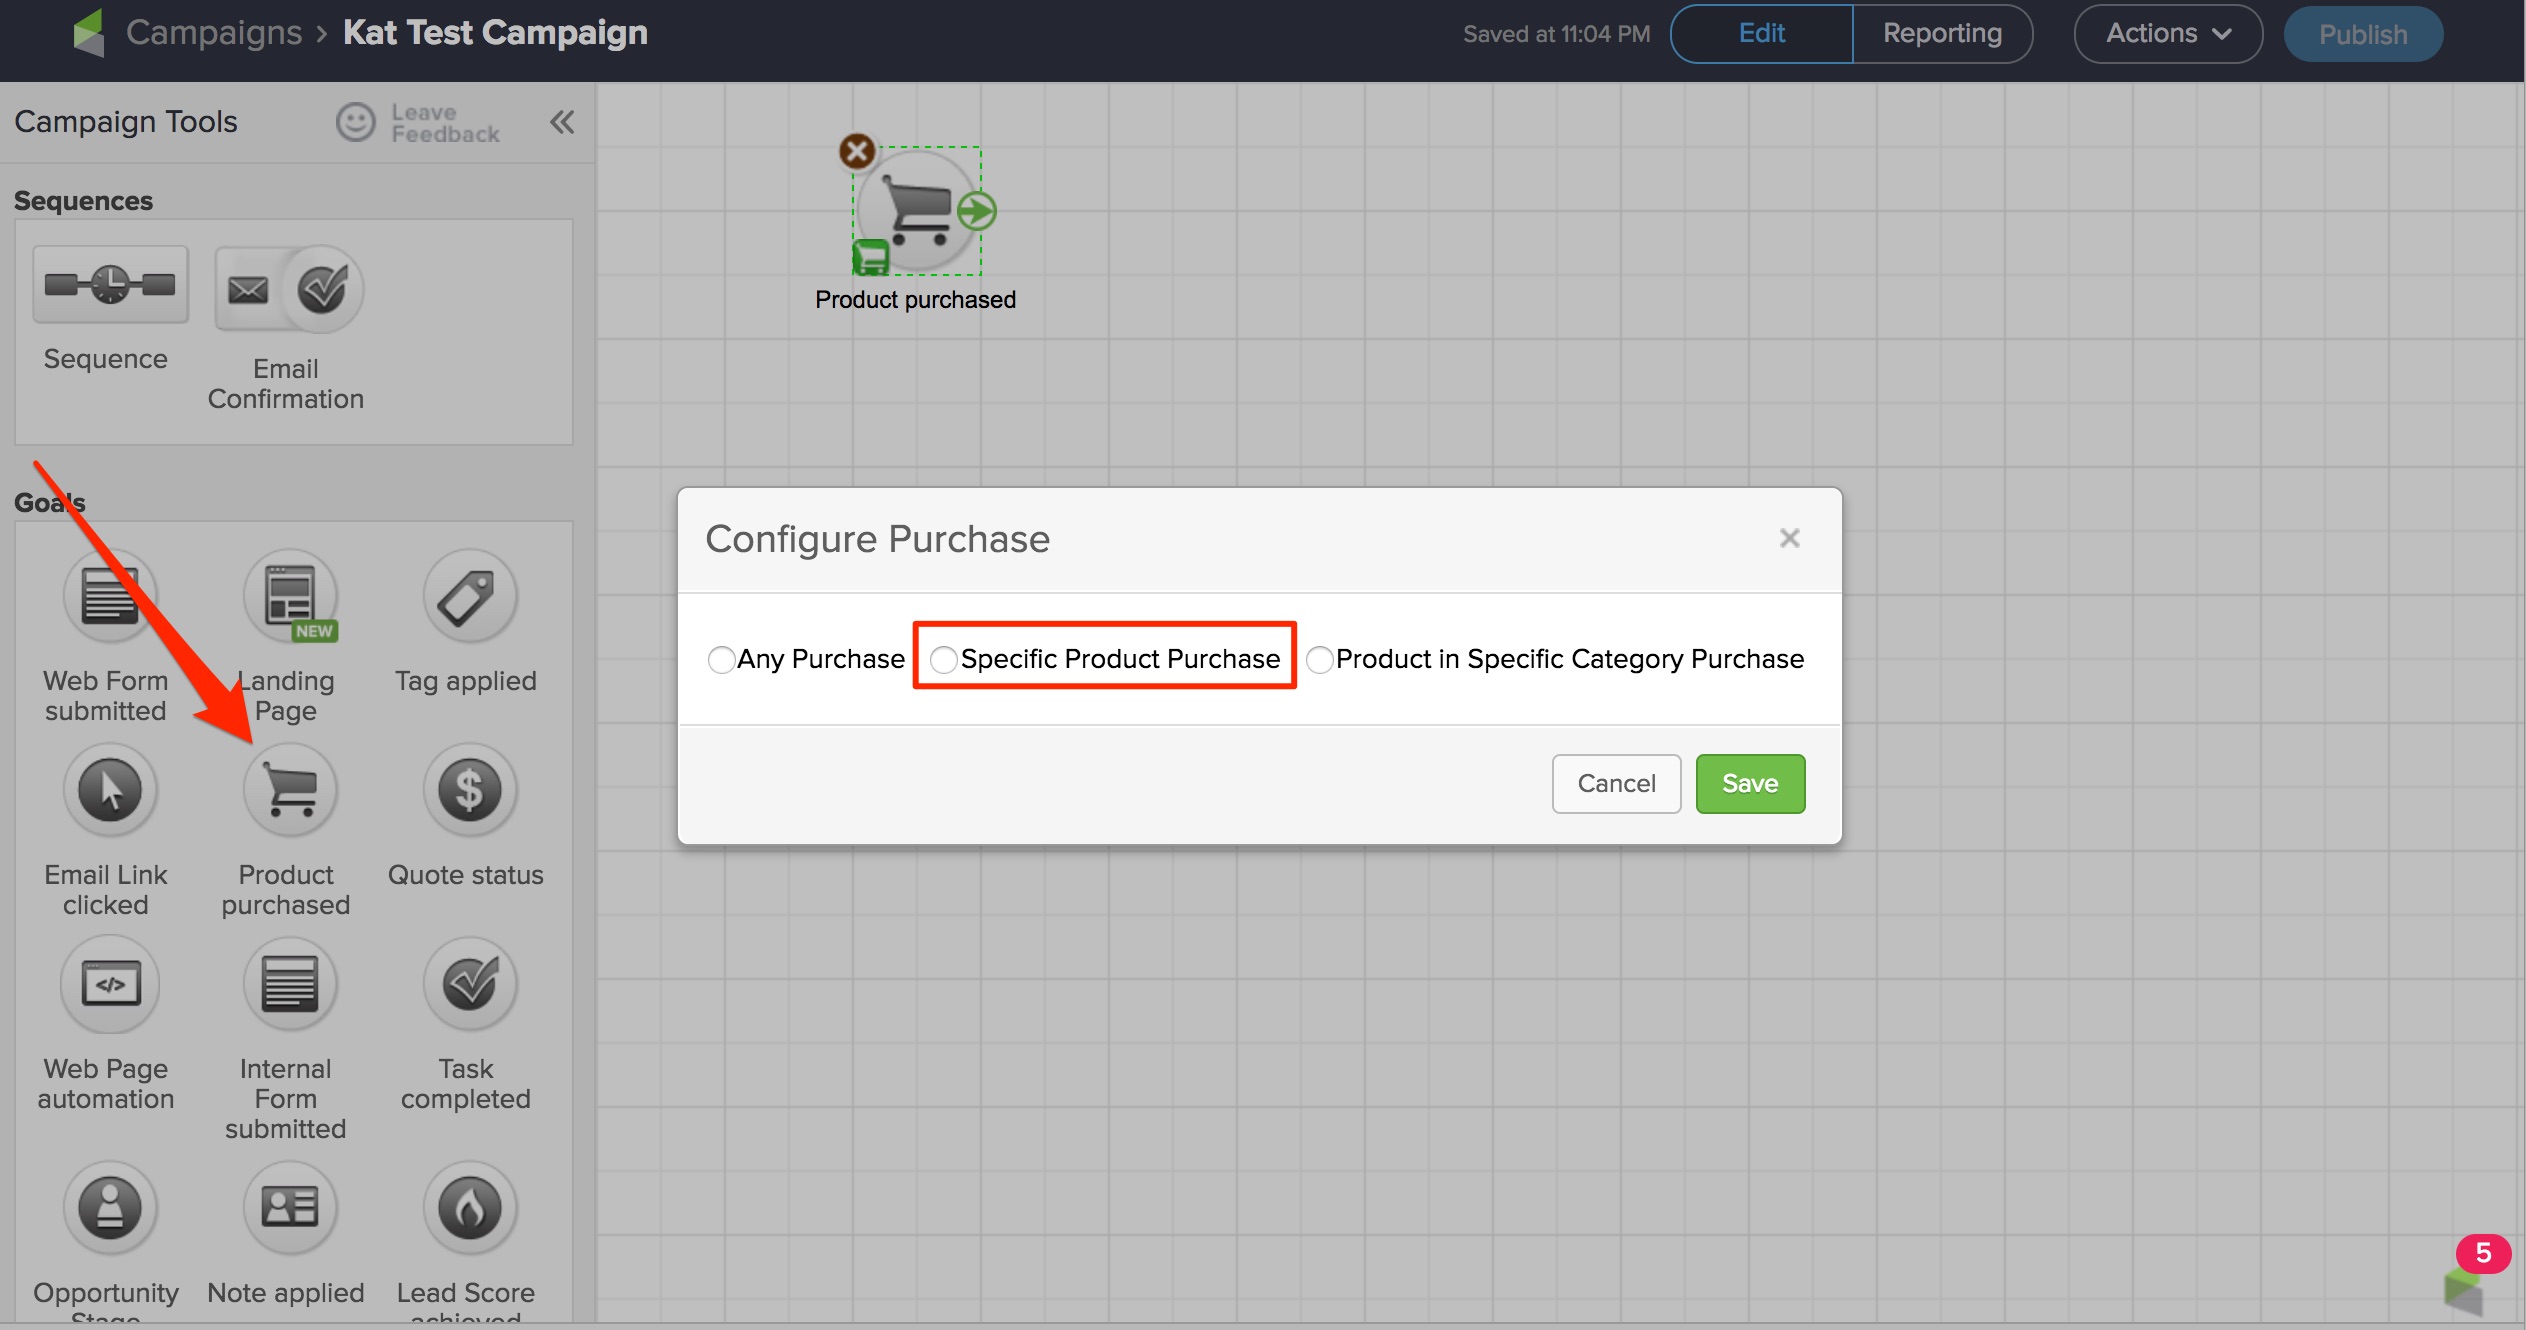
-
Create a sequence
Click-and-drag a sequence onto the page. Connect your goal to your sequence by clicking and dragging the goal icon the sequence icon. Then, double-click on the sequence icon to configure the sequence.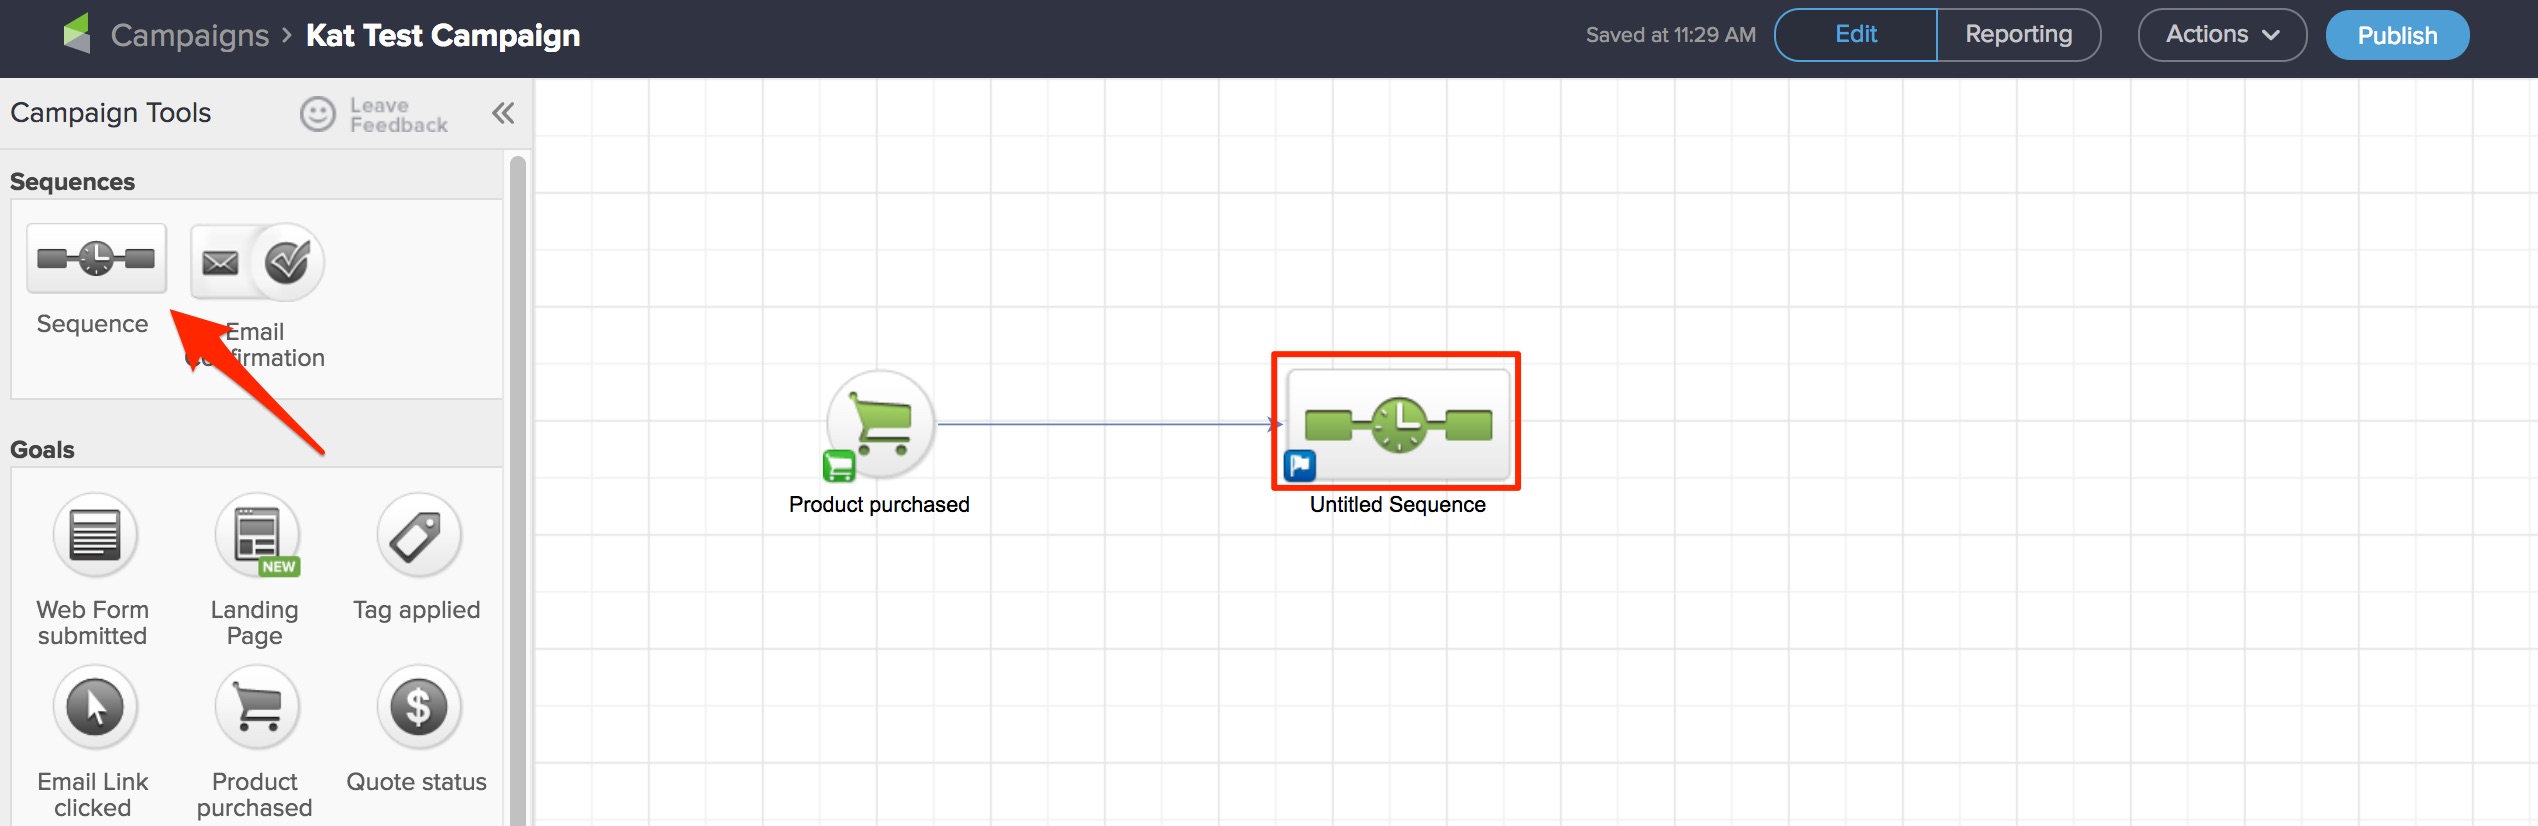
-
Define the process and configure the HTTP Post:
On the next screen, click-and-drag the process Send HTTP Post icon onto the page. Then, double-click Send HTTP Post to configure the post.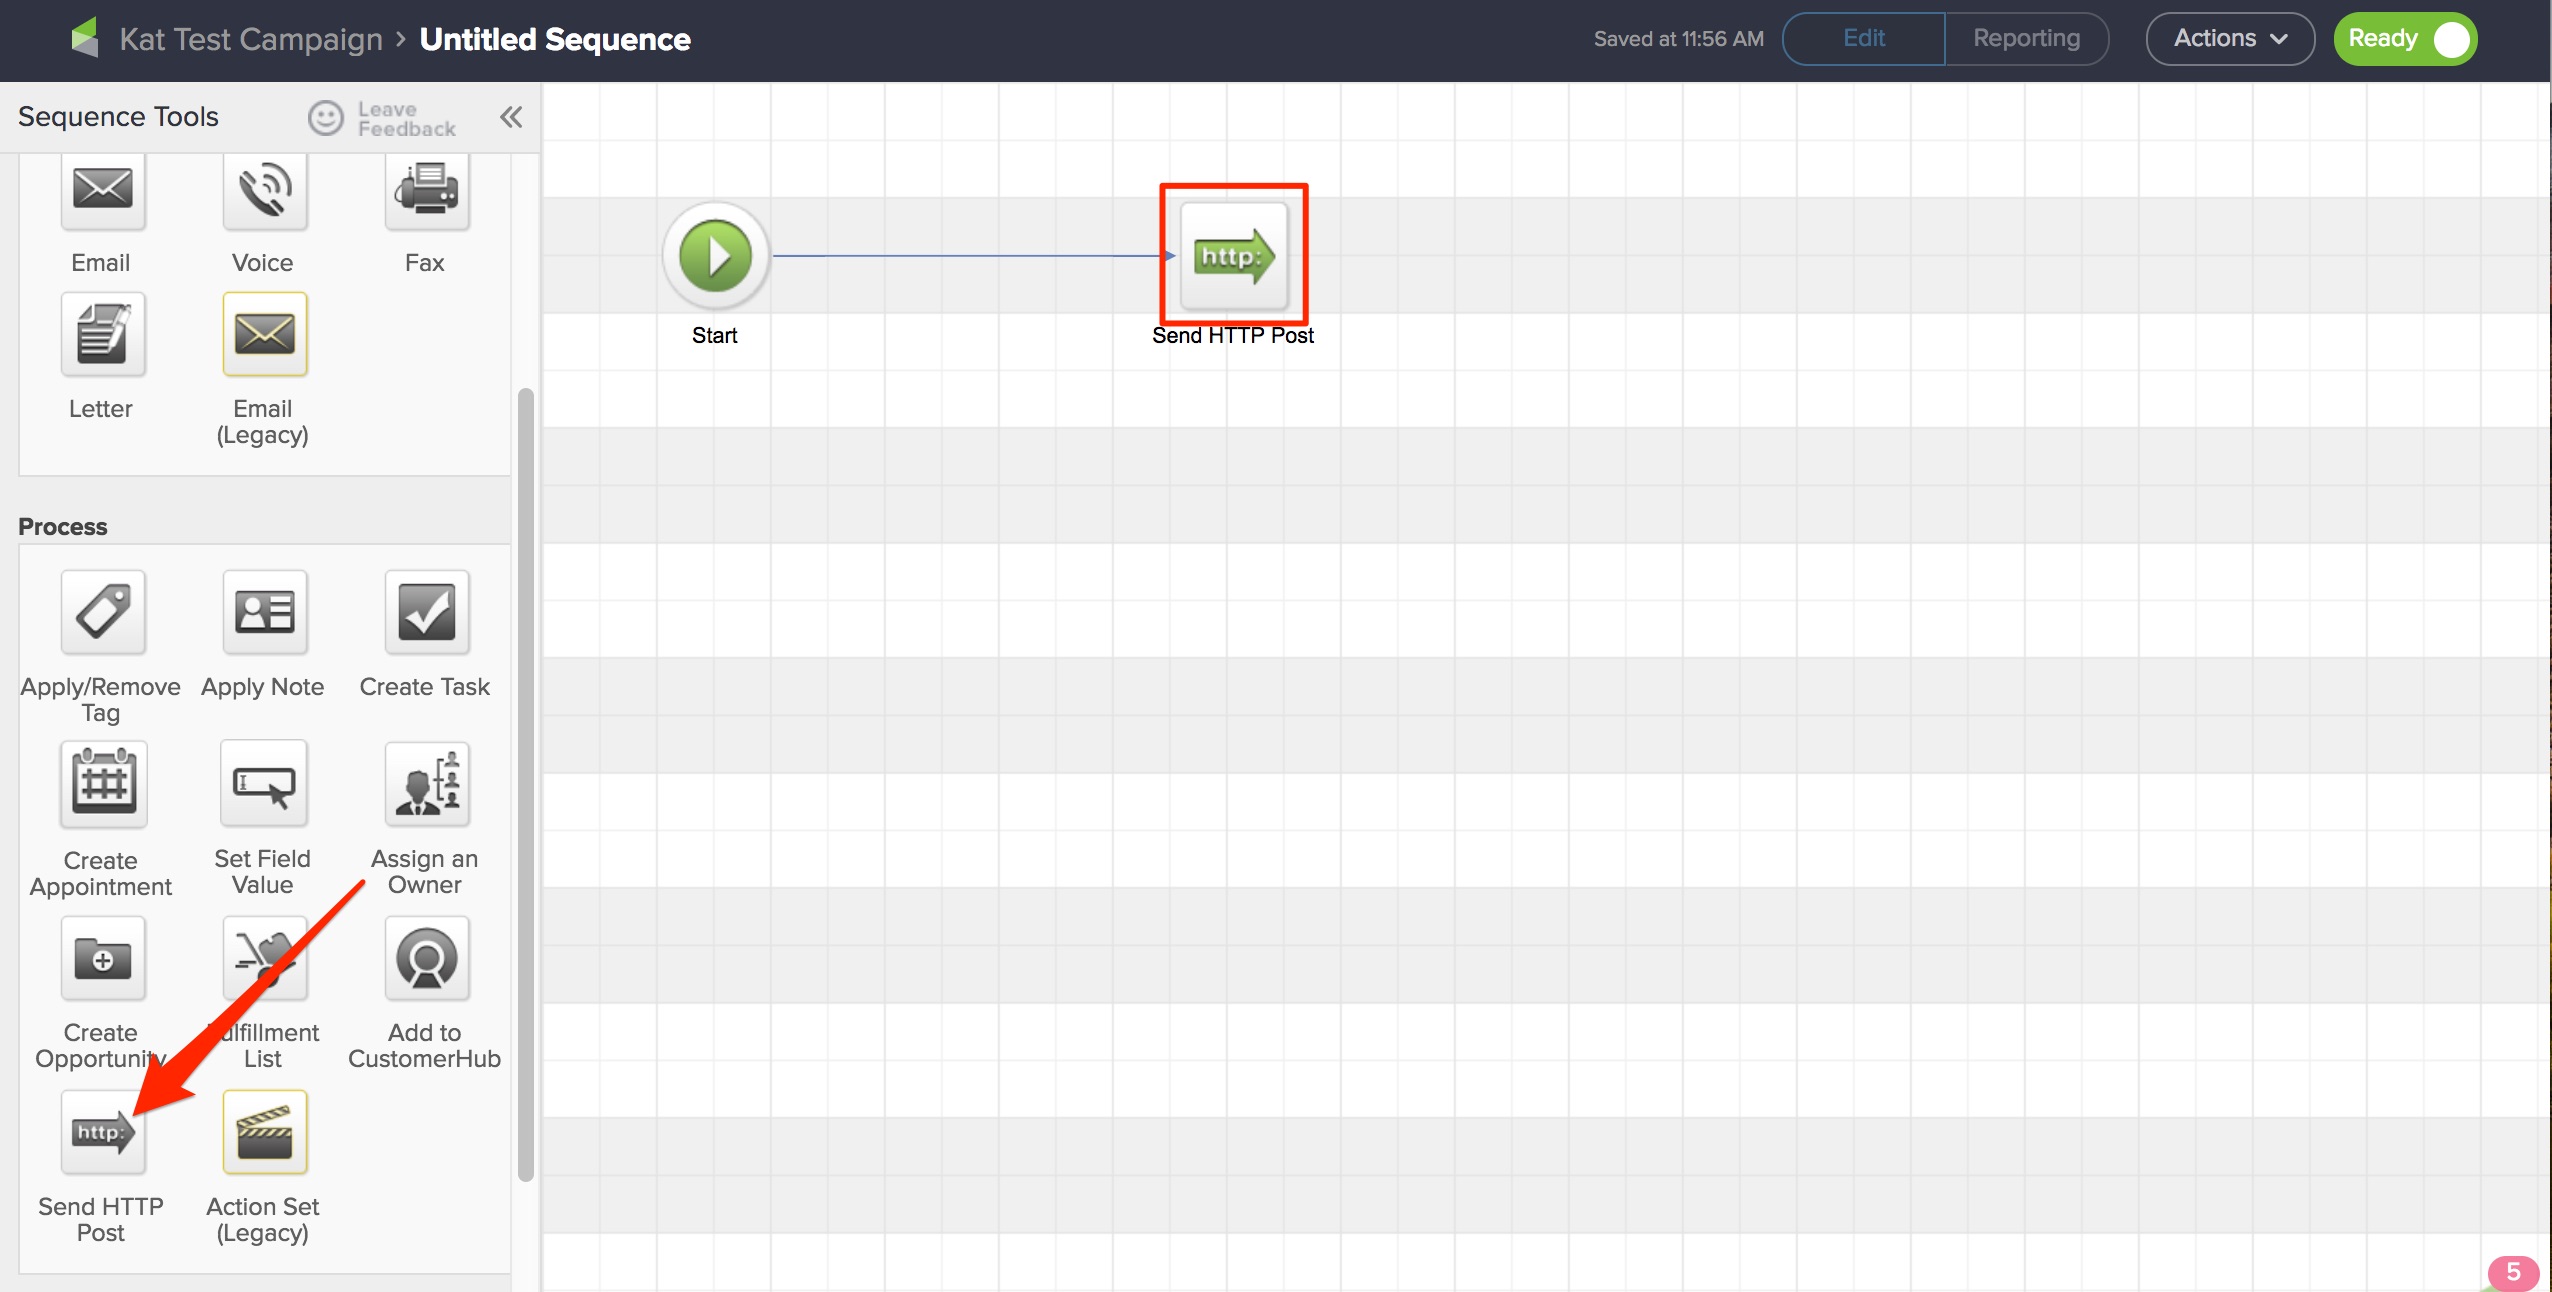
On the next screen, you'll need to paste in the POST URL for your product on Thinkific to enroll the student. This can be found in your Thinkific admin dashboard on the Infusionsoft configuration page. Ensure that you've selected the correct course from the dropdown and then use the Copy Link button to copy the Enroll share link as shown below: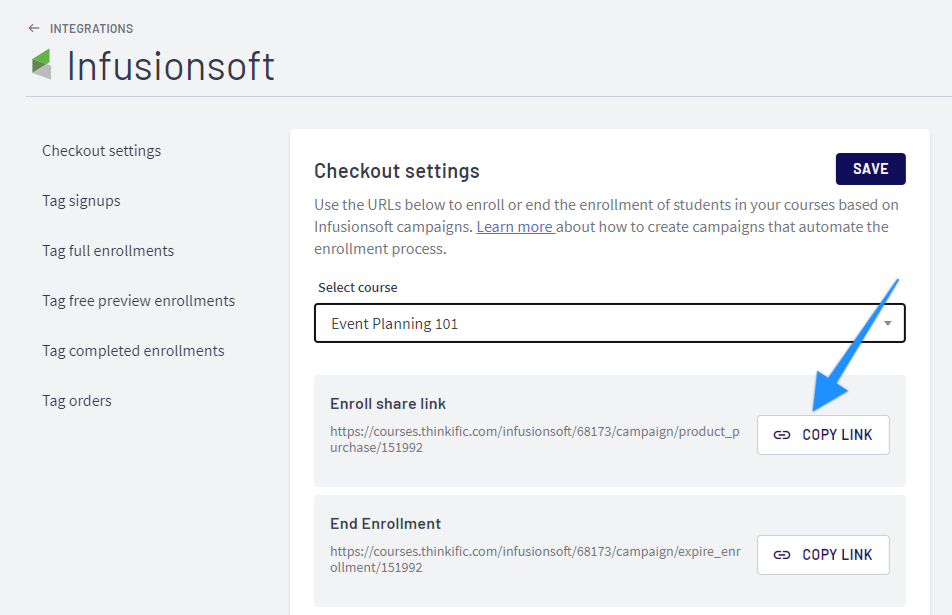
Copy-and-paste that URL into the POST URL field in Infusionsoft, and then hit the Merge button.
-
Merge your variables:
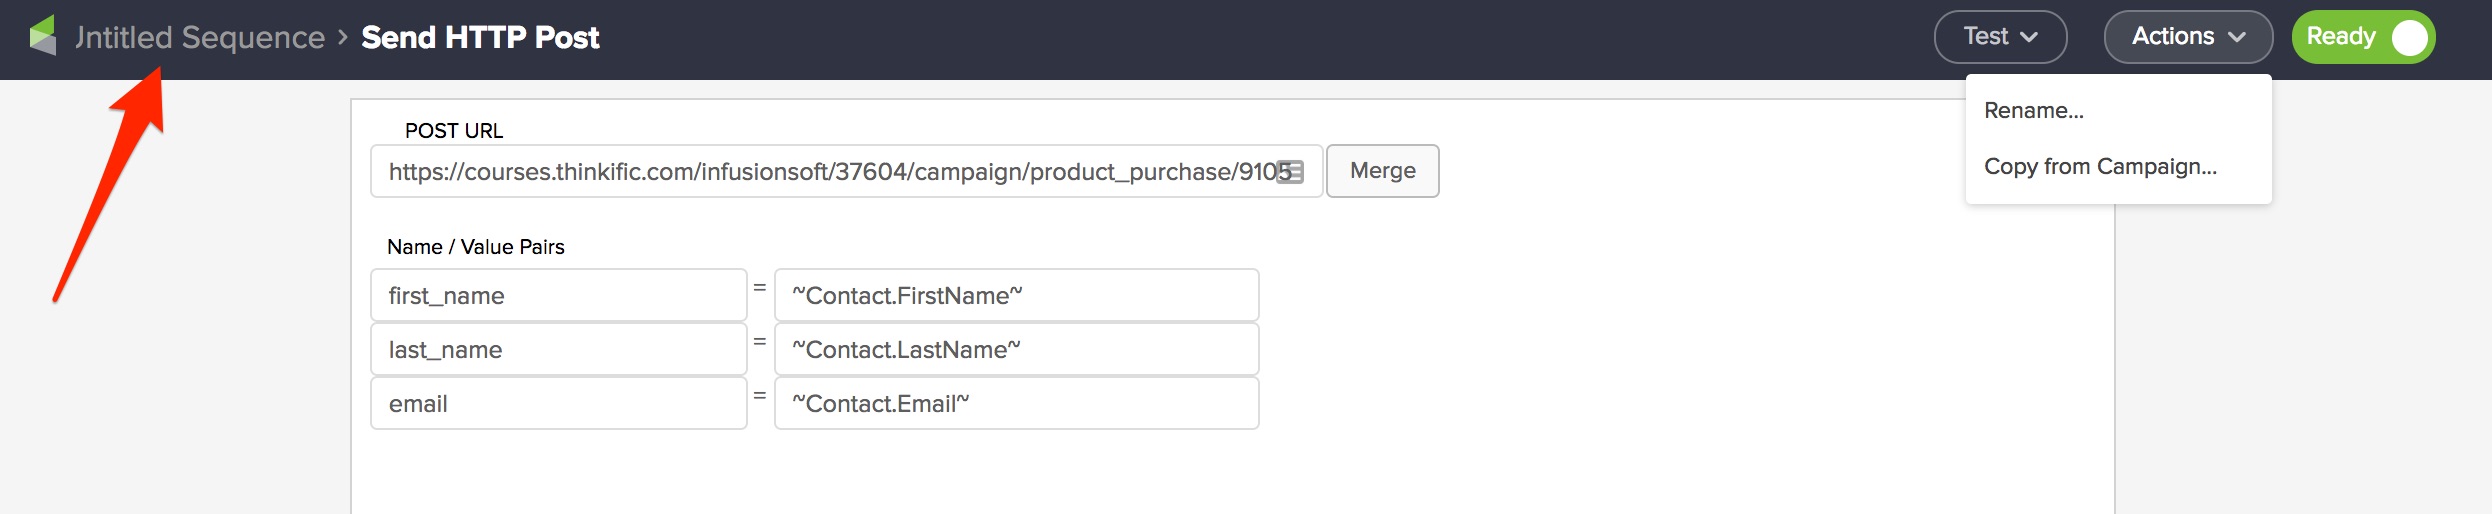
Now you need to merge the variables of Thinkific and Infusionsoft so that user accounts and enrollments can be created in Thinkific following purchase of the product, as shown below.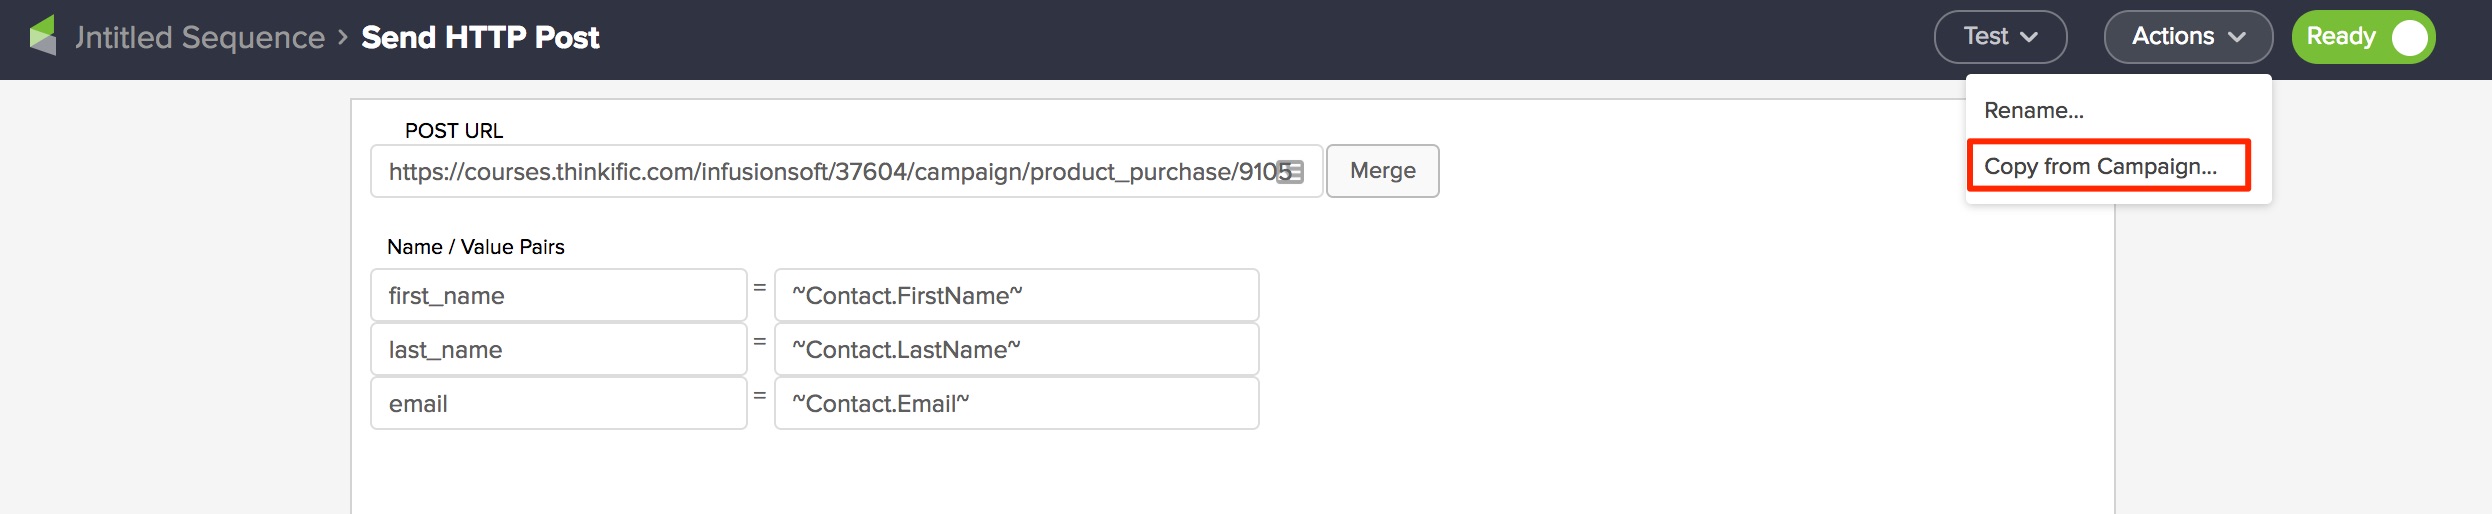
The left-hand column is the name of the variable in Thinkific, and the right-hand column is the name of the variable in Infusionsoft.
Here's a list of the Thinkific variables to be typed into the left-hand column, and the corresponding Infusionsoft variables that can be selected from the list of Merge Fields down the right side of the page. (This is a one-time only thing, as next time you can copy the variables from an existing campaign, as shown in the screenshot above).
Required Name/ Value Pairs:
Thinkific Infusionsoft first_name ~Contact.FirstName~ last_name ~Contact.LastName~ email ~Contact.Email~
Optional Name/Value Pairs:Thinkific Infusionsoft password ~Contact.Password~ expiry_date Type this in, if applicable.
Must be in the format: YYYY-MM-DD
*passwordNo password (this is the recommended setup): if you leave out the password name/ value pair then after the student has paid via Infusionsoft, Thinkific can trigger your site welcome email to go out through Thinkific, which will enable the student to set their own password.To trigger the site welcome email on Infusionsoft HTTP posts, make sure you have the option checked off in your Infusionsoft configuration: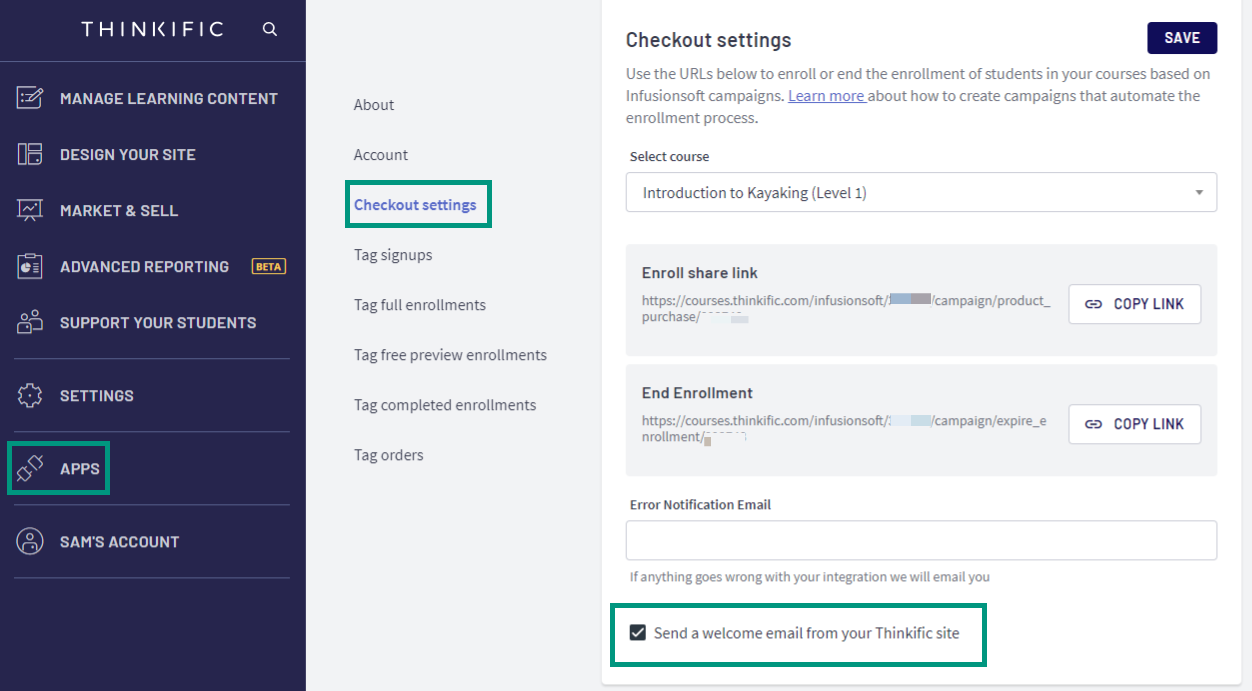
*the welcome email that is triggered is the site welcome email that you can edit in your Notifications section in Thinkific. It utilizes the Express Sign In Link that enables students to set their own passwords.Password: There are two ways to set passwords for students at the time of order:
1. You can set a temporary password that will be the same for all students by filling in the merge field with a temporary password such as "password1" instead of ~Contact.Password~. Then you can supply students their temporary password so that they can login.
2. You can add a field to your order form for password that then sends to Thinkific in the merge field ~Contact.Password~.
If you'll be using our default passwords, it's a good idea to send students a site welcome email with their login credentials and instructions for changing their password. Site welcome emails can be sent out automatically by our system (see the Notifications page of the admin dashboard), or by Infusionsoft - we recommend choosing one and switching off the other (the Infusionsoft welcome emails can be switched on/off from the Infusionsoft page of your admin dashboard).
**expiry_date
An optional variable. If specified, this will override any expiry date already set in Thinkific. If no expiry date is specified, the student will be enrolled indefinately.
-
Publish everything!
Once you're done merging your variables, ensure that everything has saved, switch the status of the HTTP Post from Draft to Ready, and hit Back to Sequence.
Then, set your sequence to Ready... And then publish your campaign...
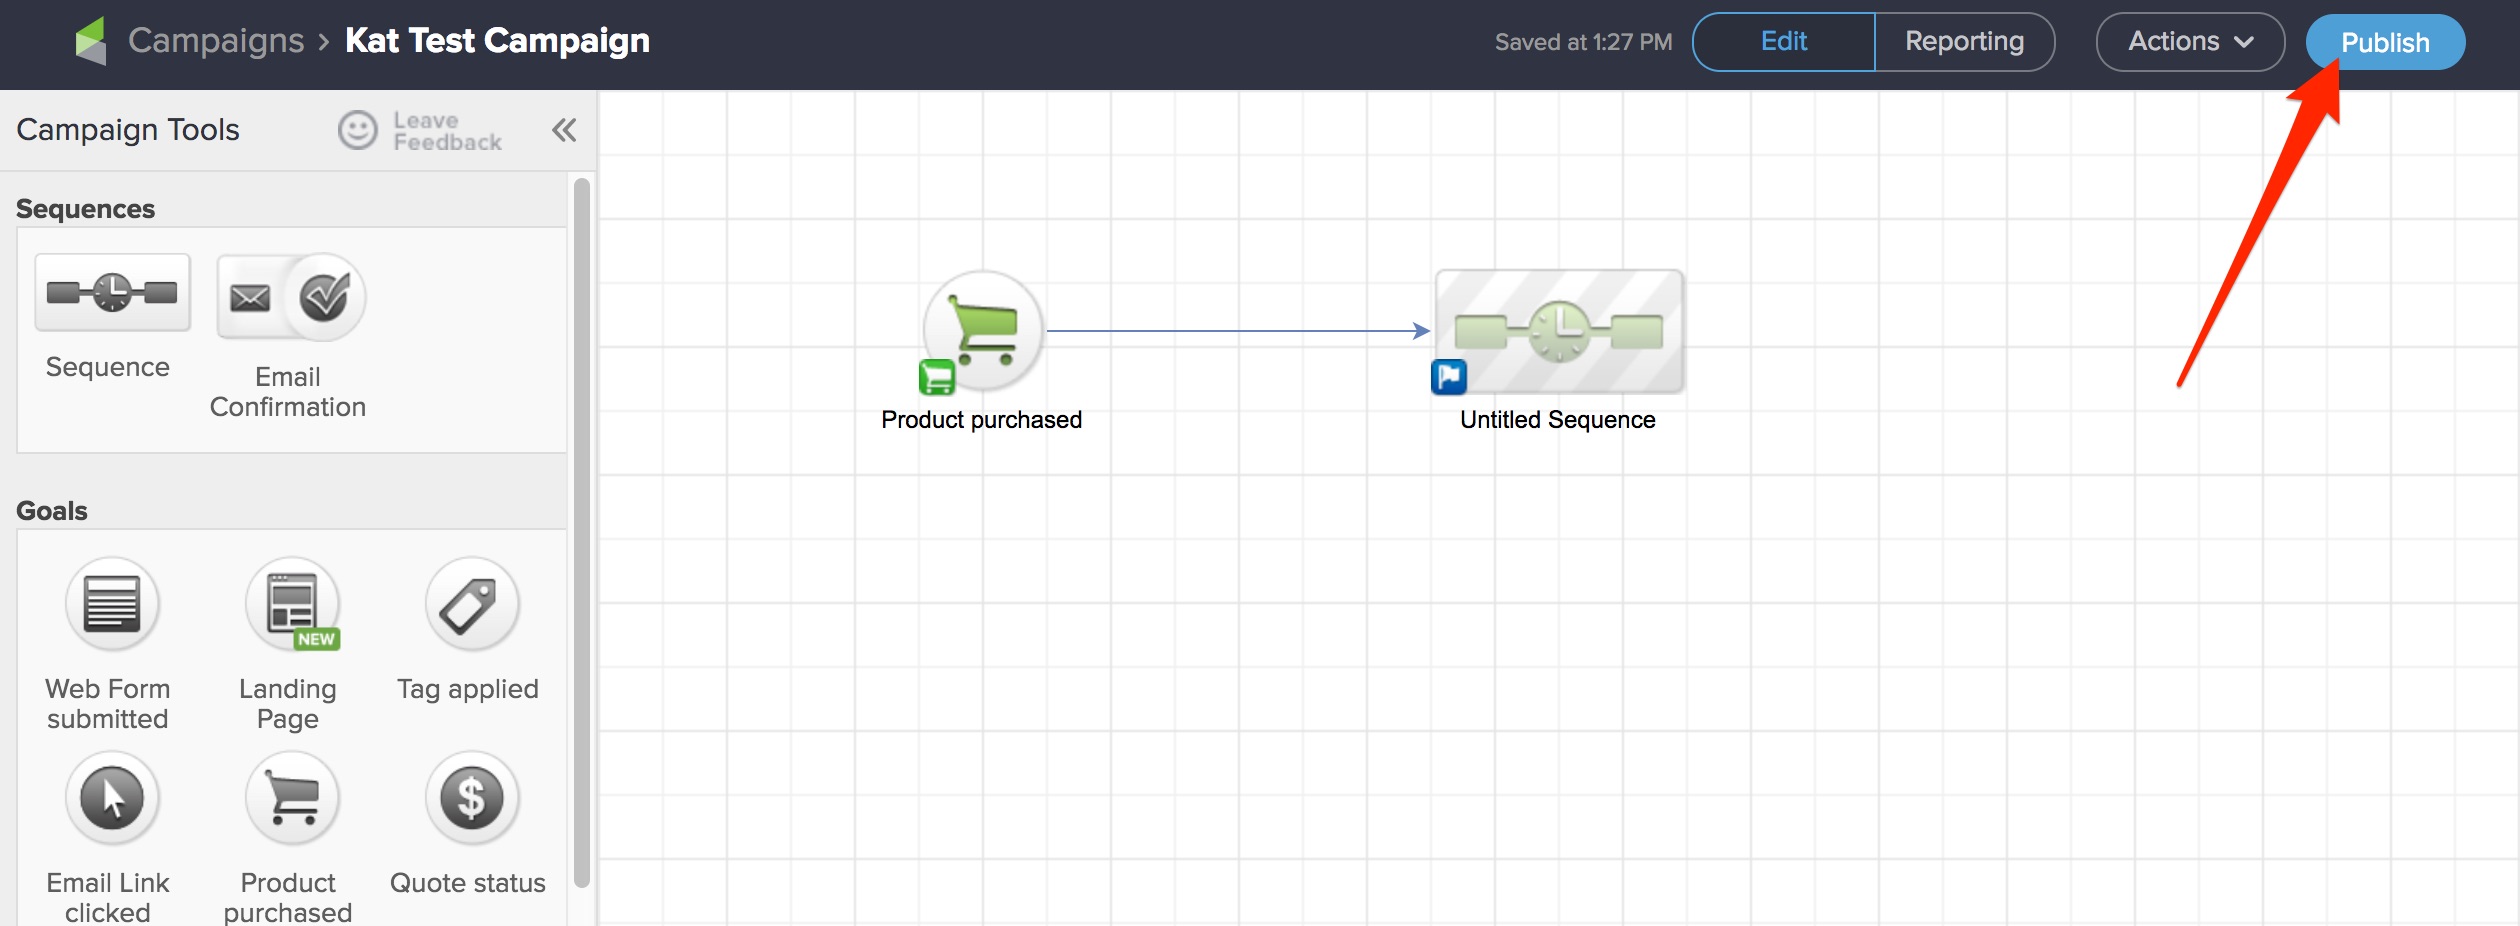
And that's it, nicely done! Your customers can now purchase your product in Infusionsoft and automatically be enrolled in the course/bundle on Thinkific!
Unenroll Students after a Failed Recurring Payment in Infusionsoft
-
Set up a Billing Automation in Infusionsoft
Head to E-Commerce Settings, then click on Billing Automation. Next, create a new trigger type for When a credit card autocharge attempt is made 2 - When an autocharge fails and the invoice contains (any product). Click on Actions to manage the trigger. Below, I've set the trigger to happen when an autocharge fails on the third attempt for Test Course 1, then, the tag Admin - Failed Recurring Billing is applied to the customer.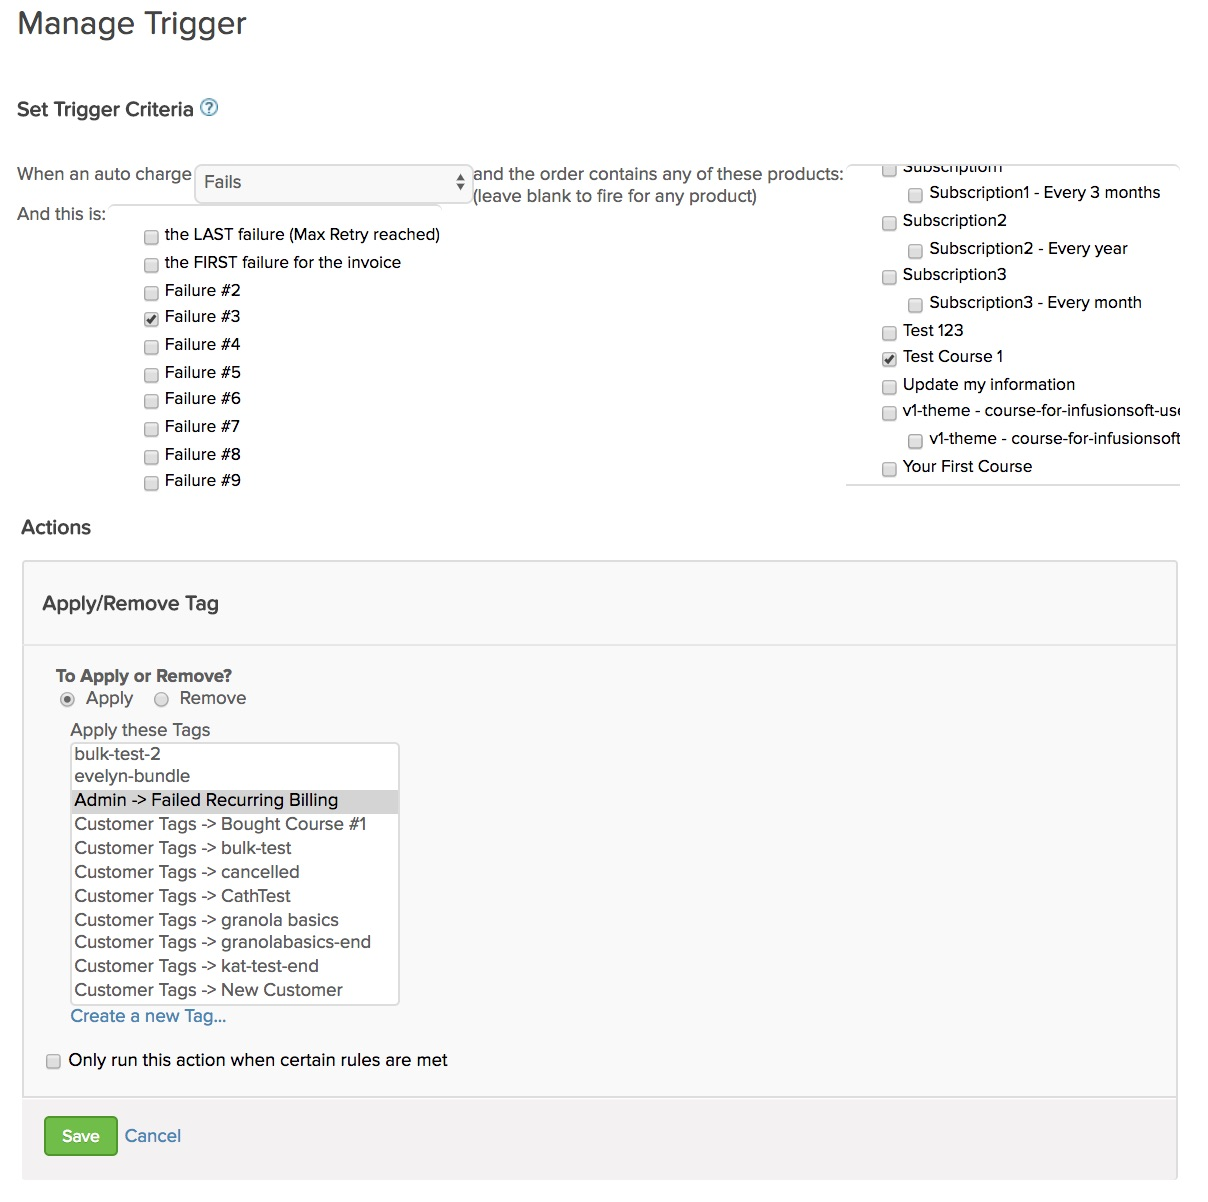
-
Set up your goal
Head back to the campaign builder to find the campaign you created for the Enroll HTTP Post and edit the existing campaign. Next, create the goal by clicking and dragging the tag applied goal onto the page. Double click on the icon to configure the tag, then select the tag you just applied to the failed payment. In this case, I used Admin - Failed Recurring Billing. Then, click Save (the tag on the Goal symbol should now turn green to confirm that it's been configured).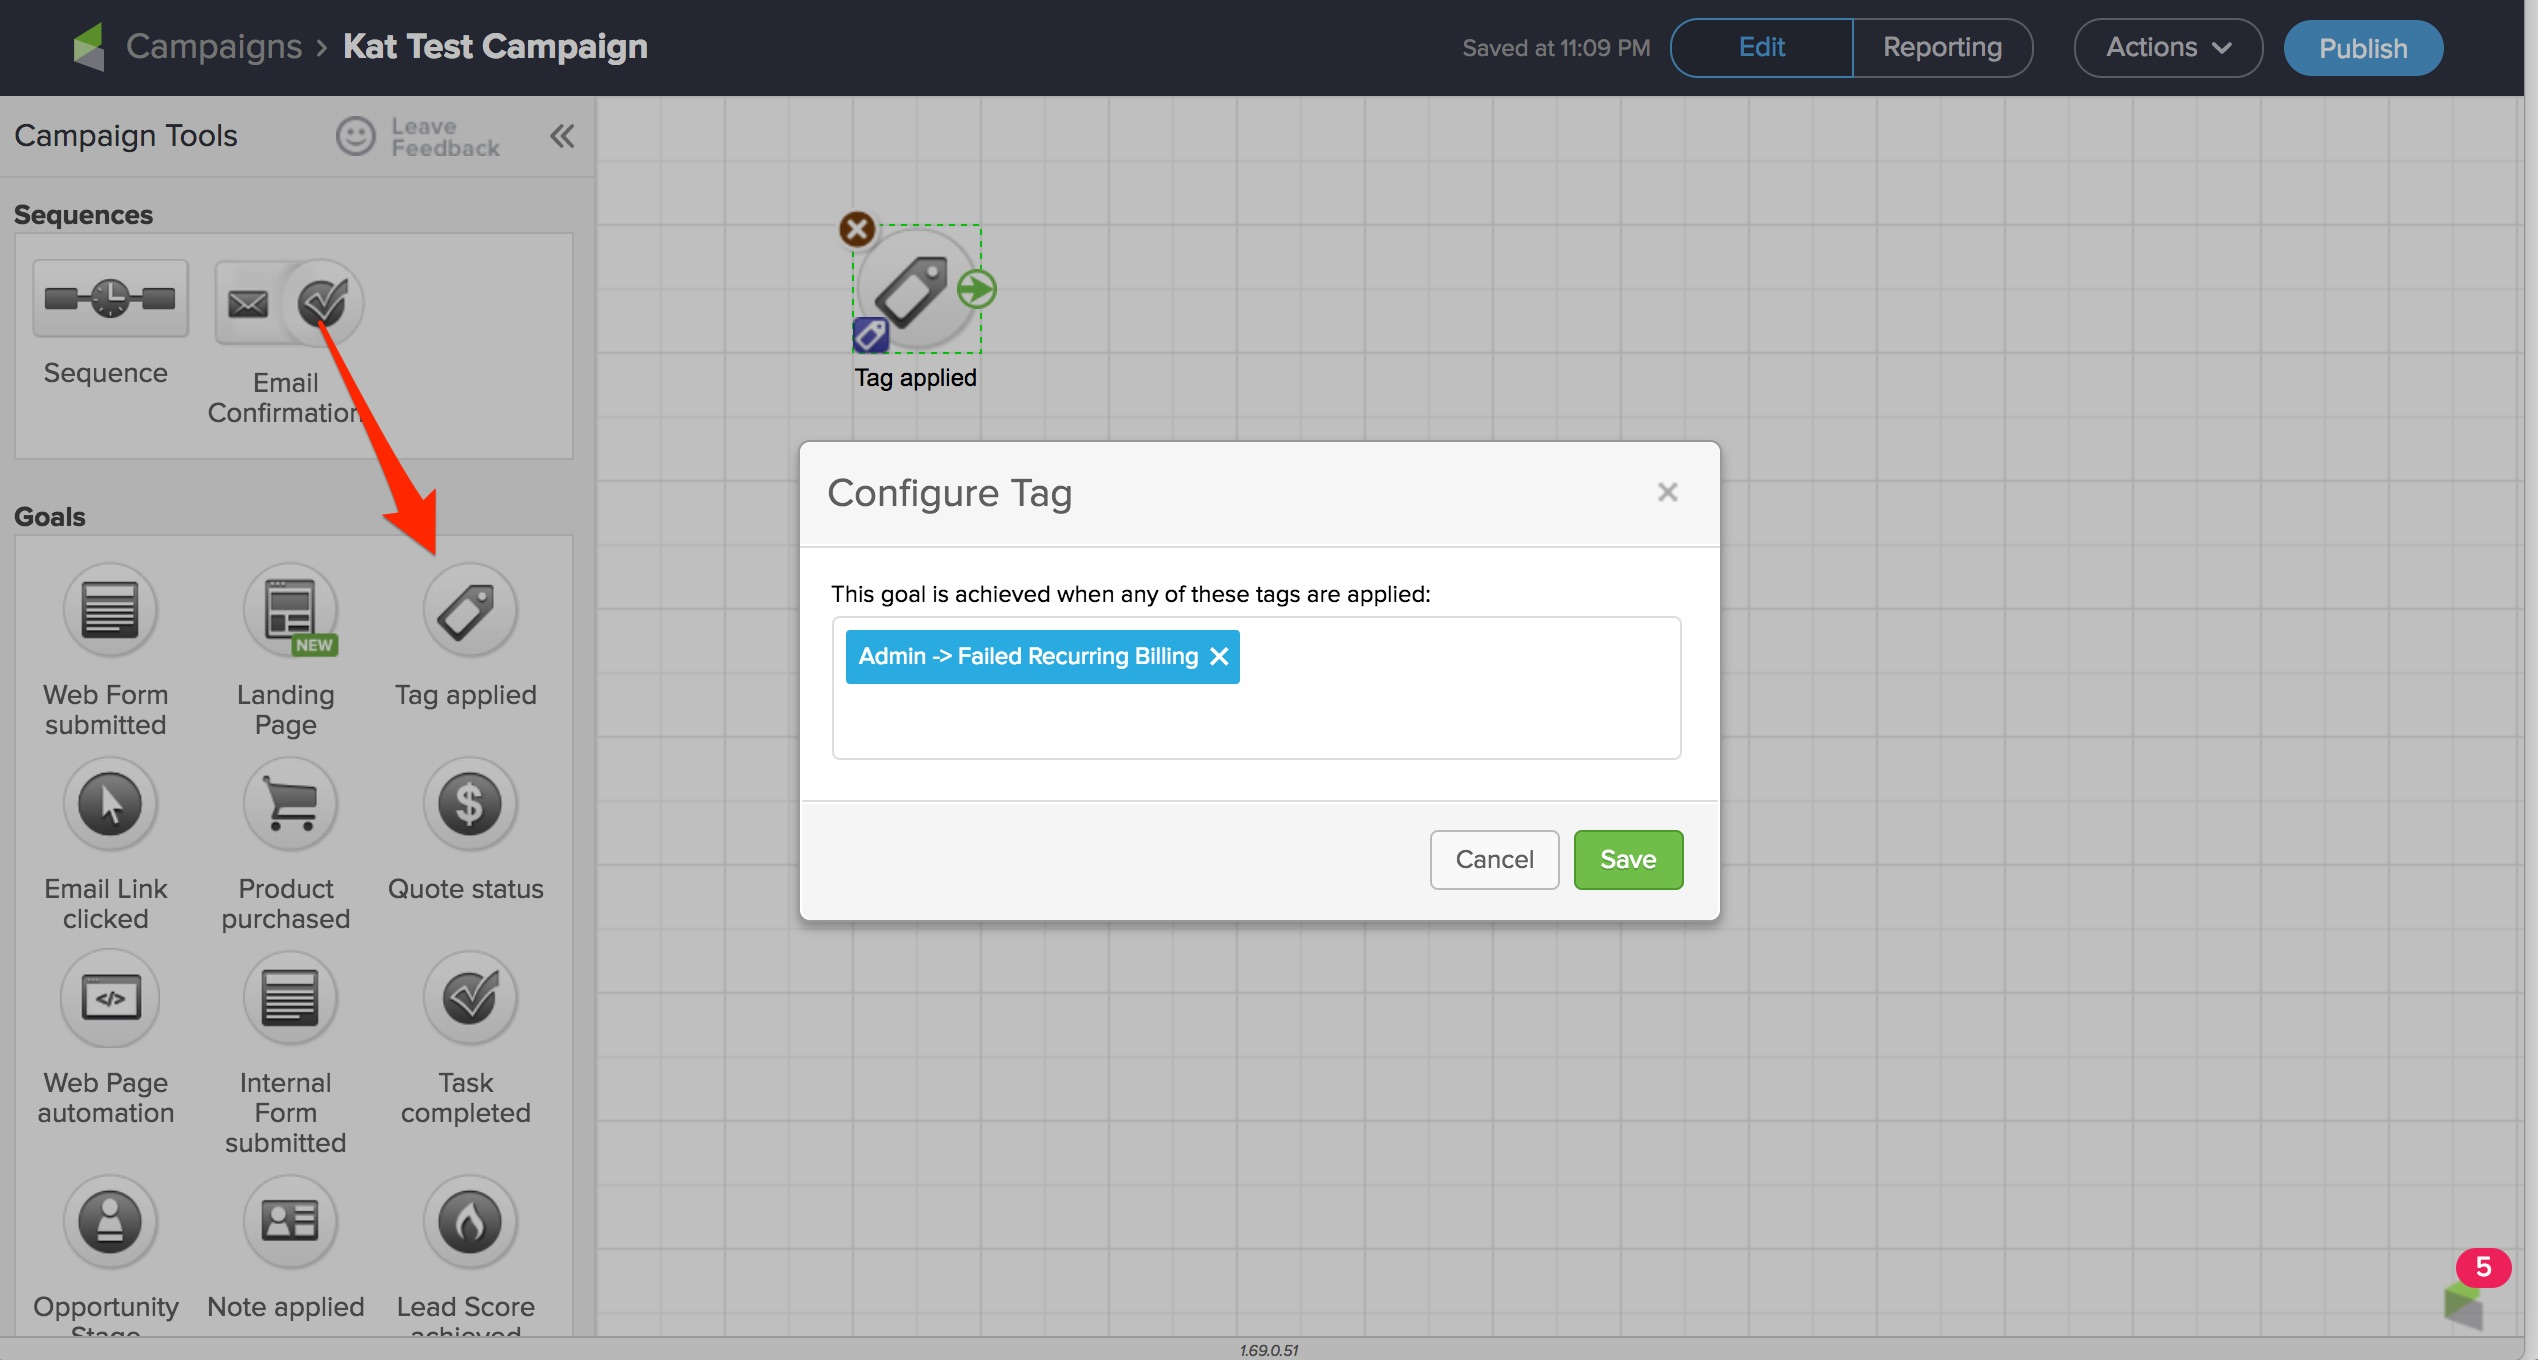
-
Set up your sequence
Create the sequence by dragging the sequence icon onto the page. Connect your goal to your sequence by clicking and dragging the arrow on the goal to the sequence. Then, double-click on the sequence icon to configure the sequence.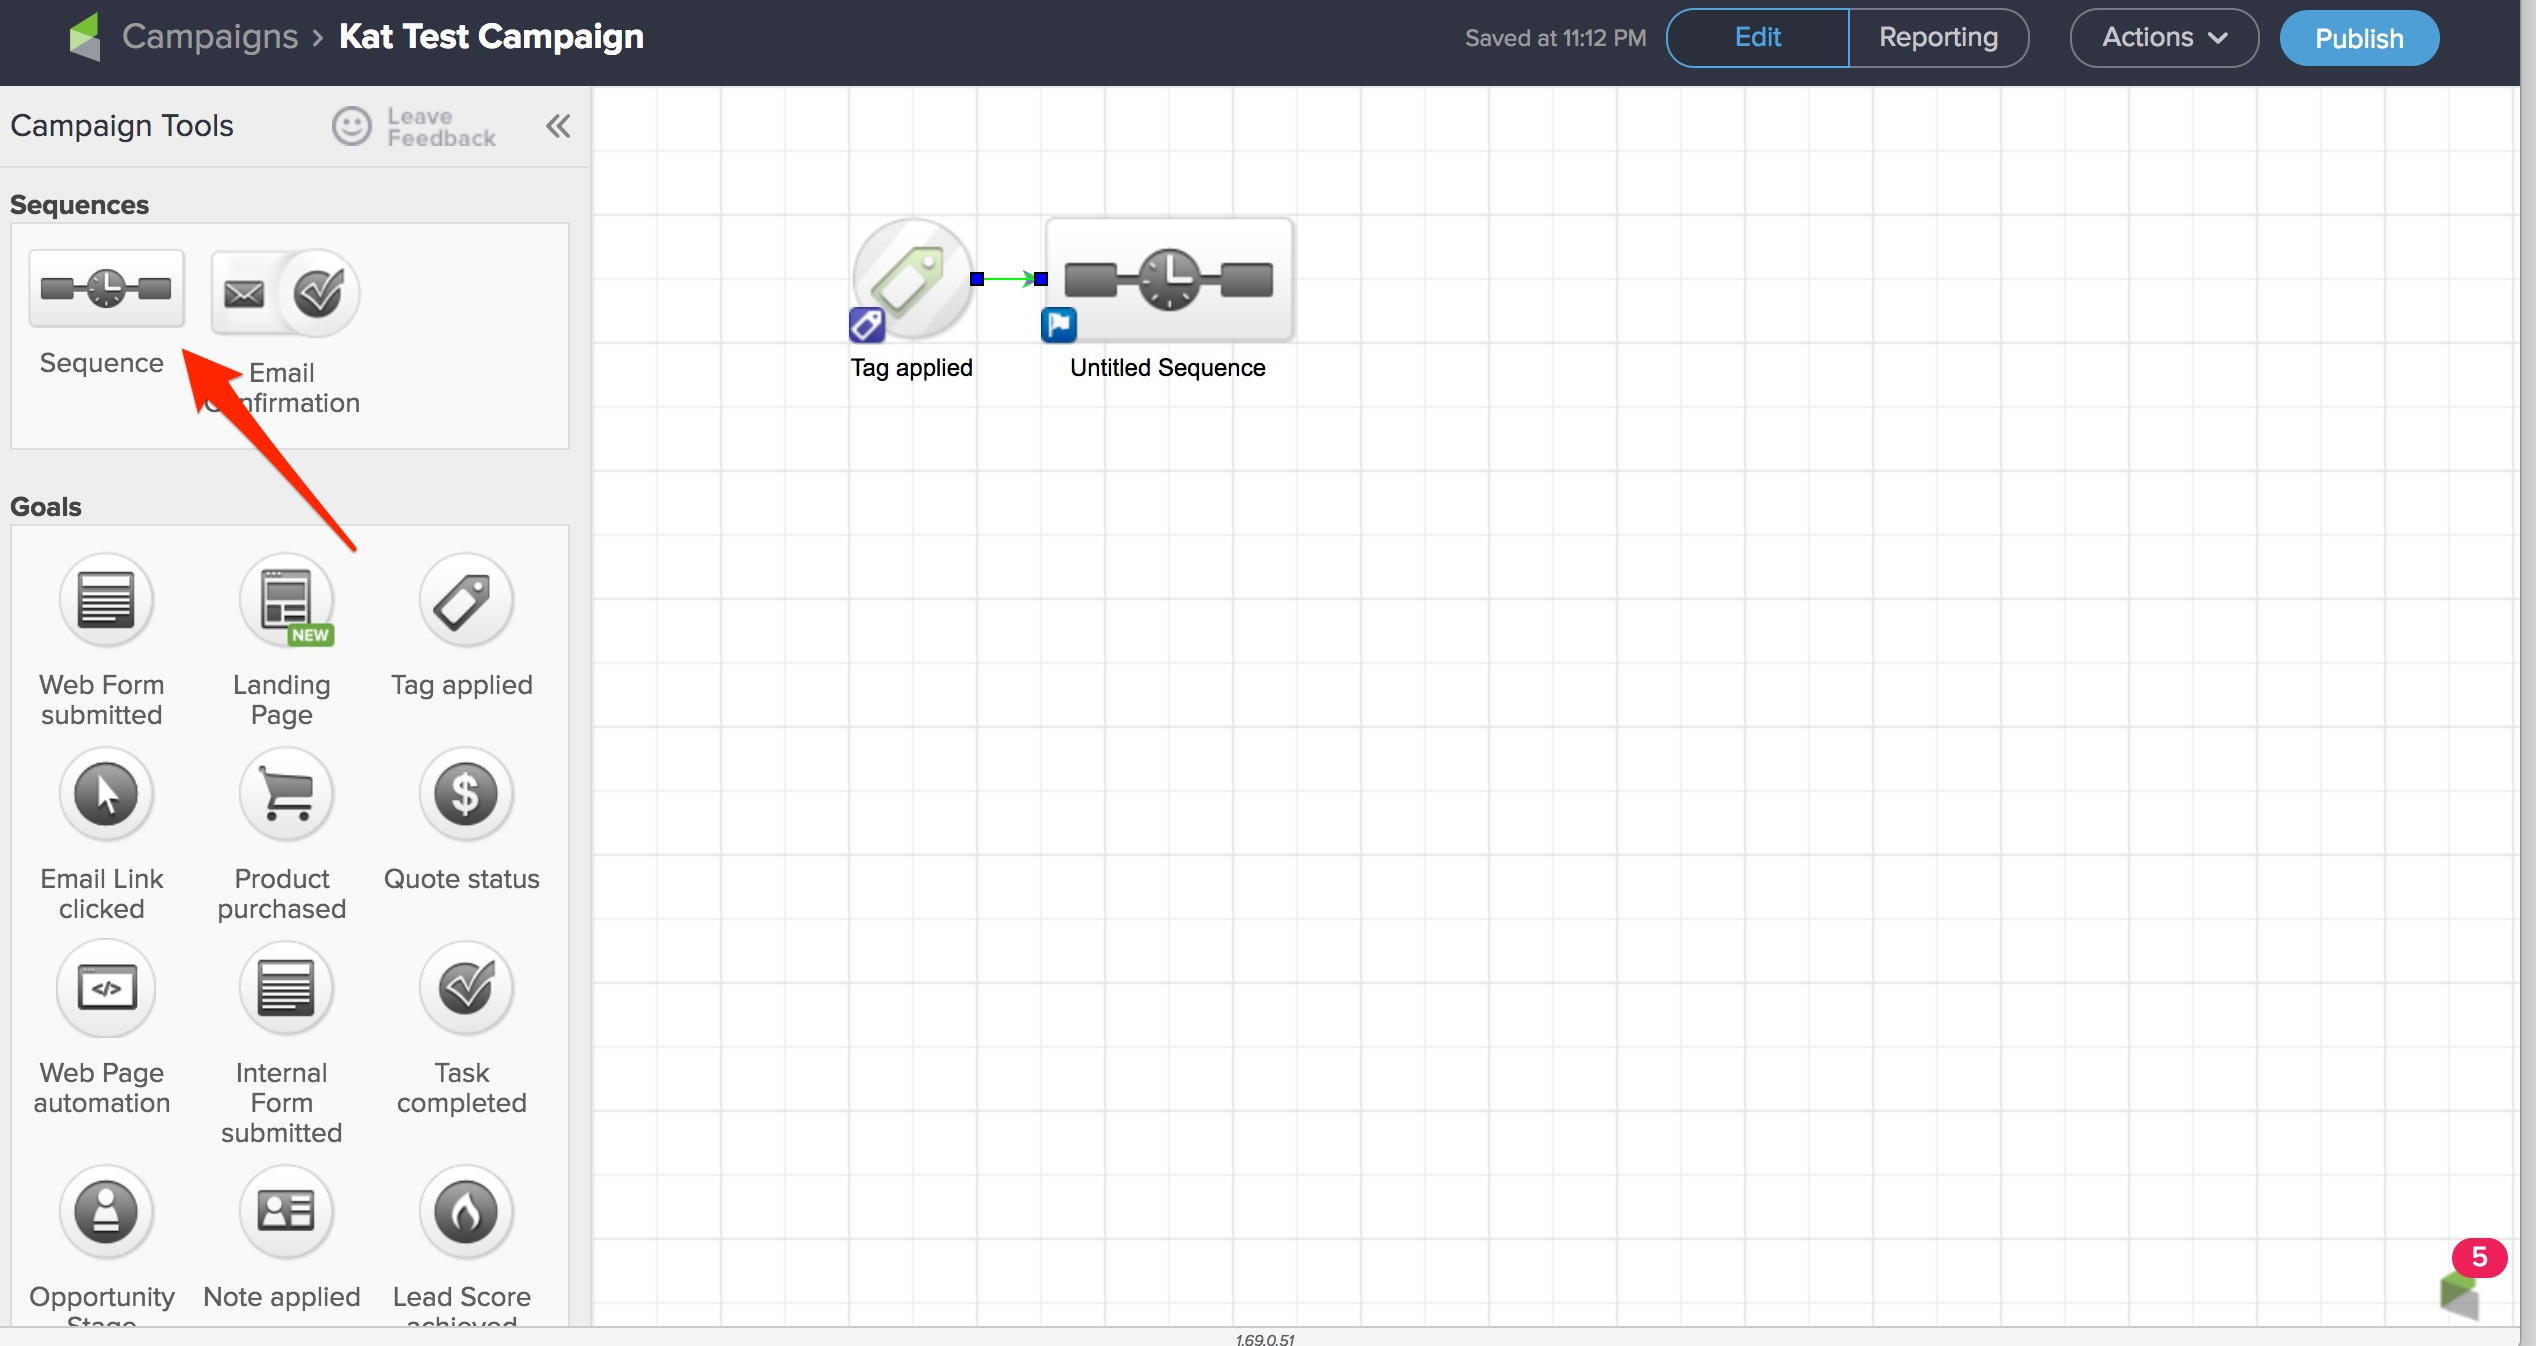
On the next screen, click-and-drag the process Send HTTP Post icon onto the page. Then, double-click Send HTTP Post to configure the post.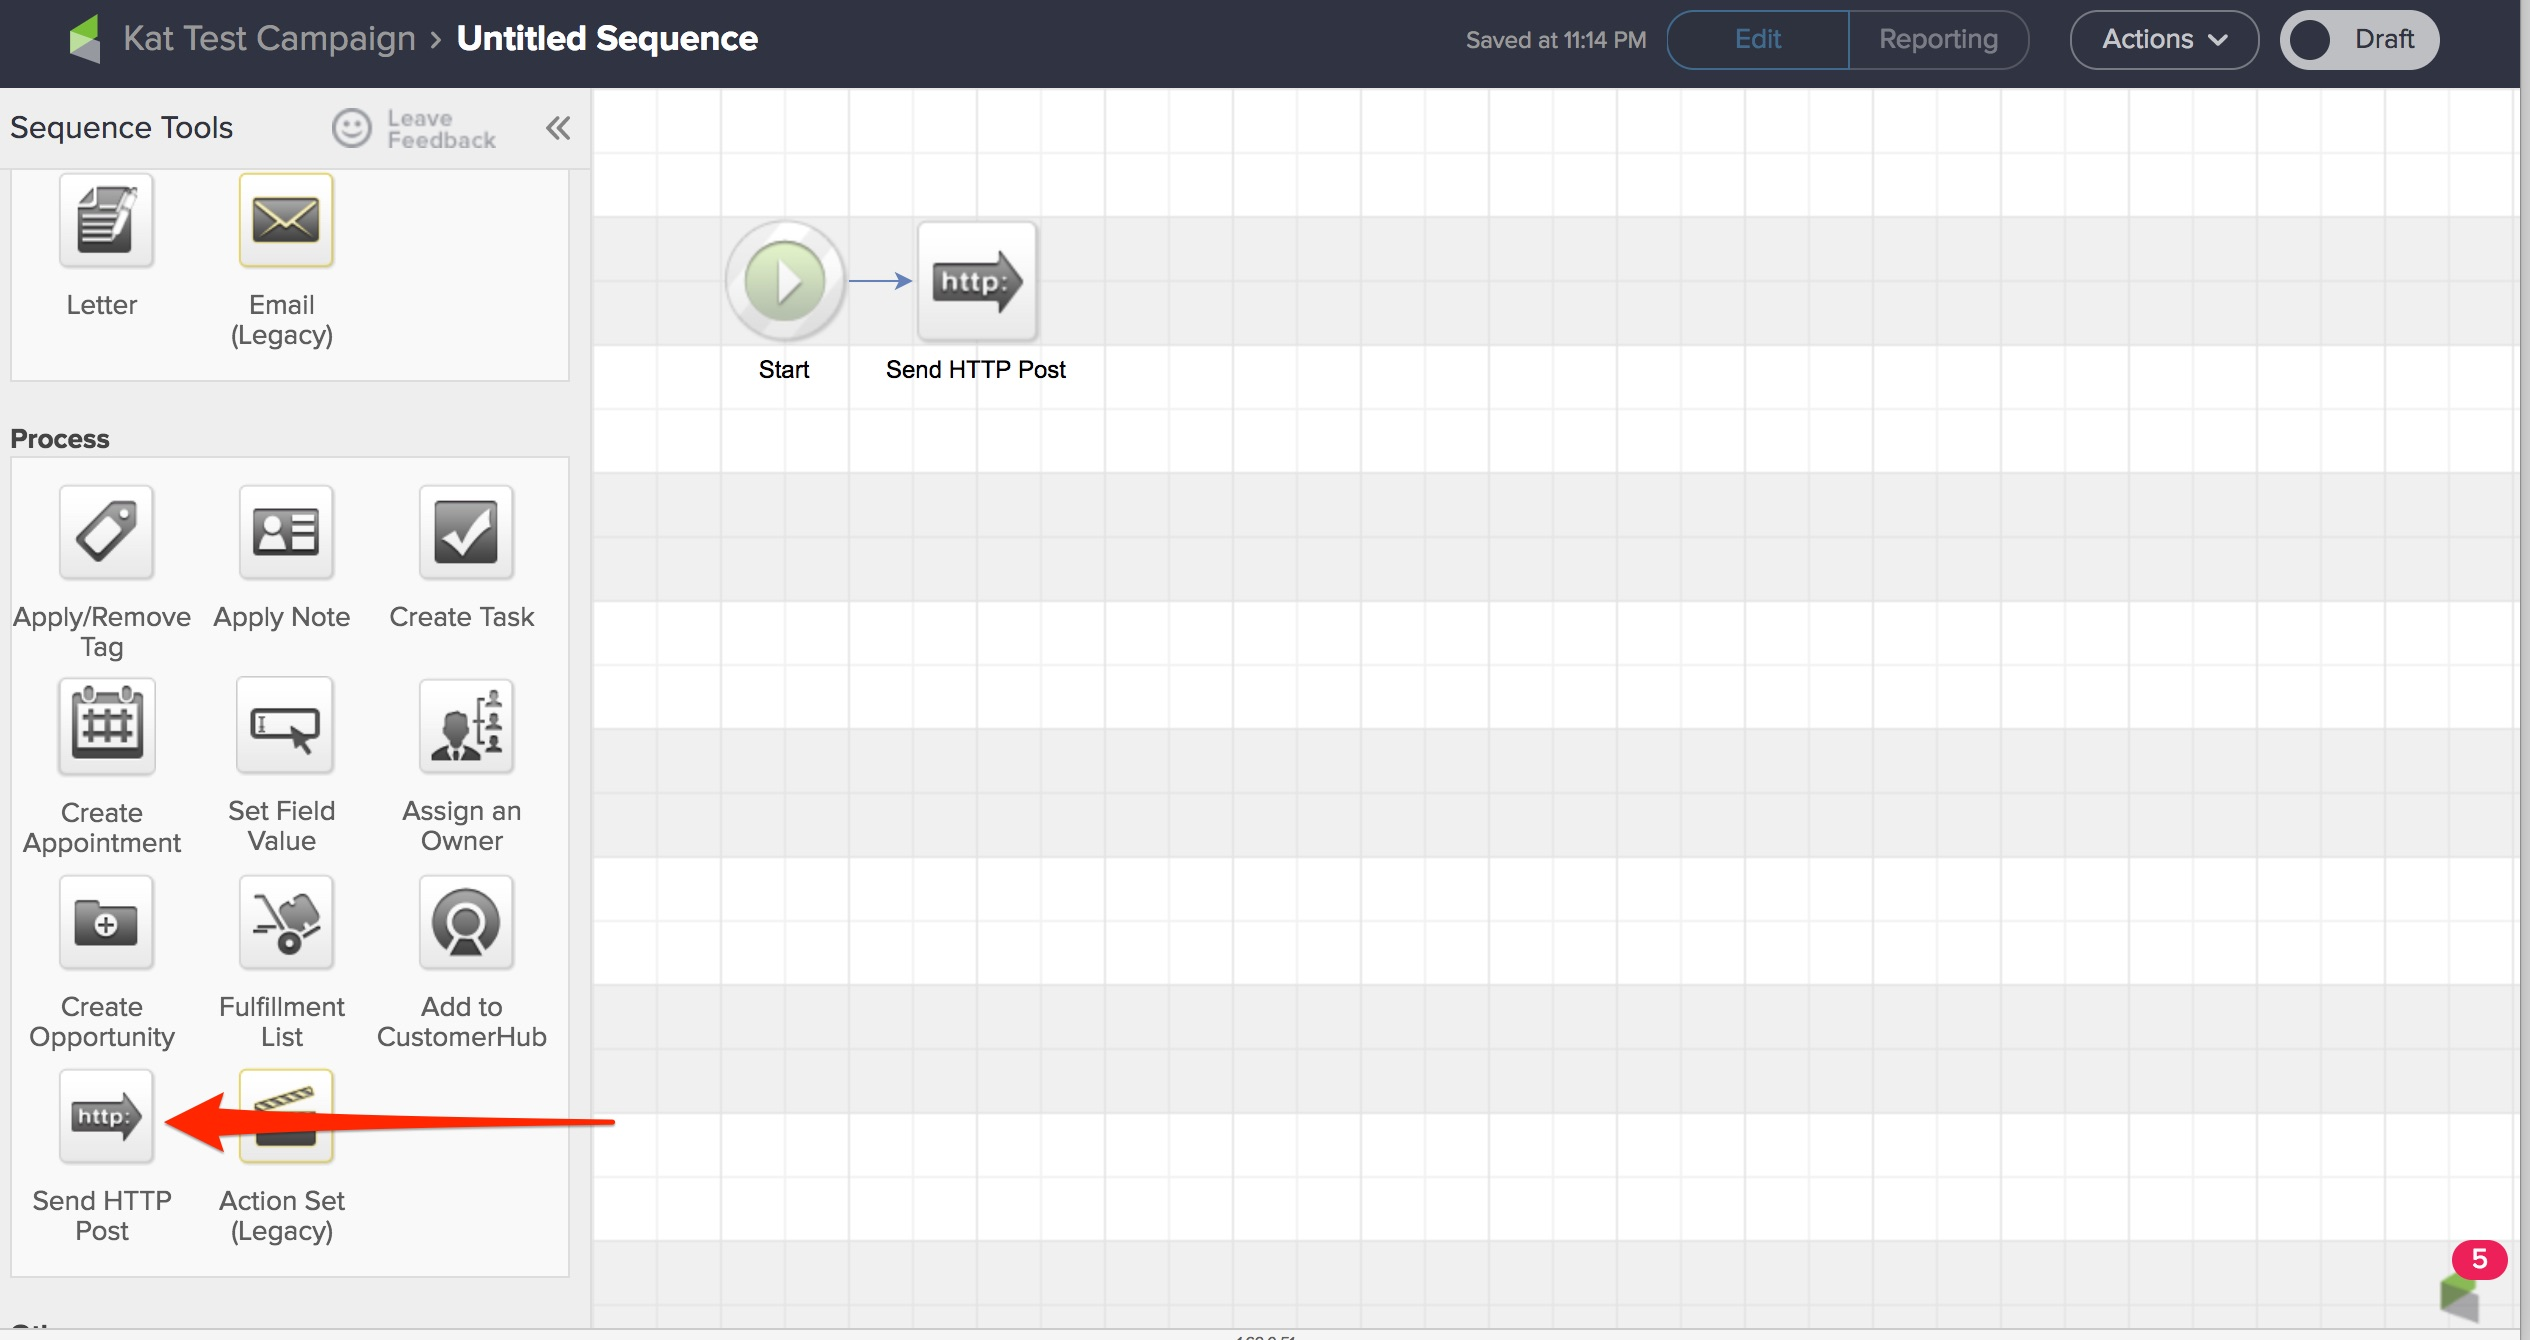
On the next screen, input your POST End Enrollment URL for your product on Thinkific. This can be found in your Thinkific admin dashboard on the Infusionsoft configuration page, as shown below.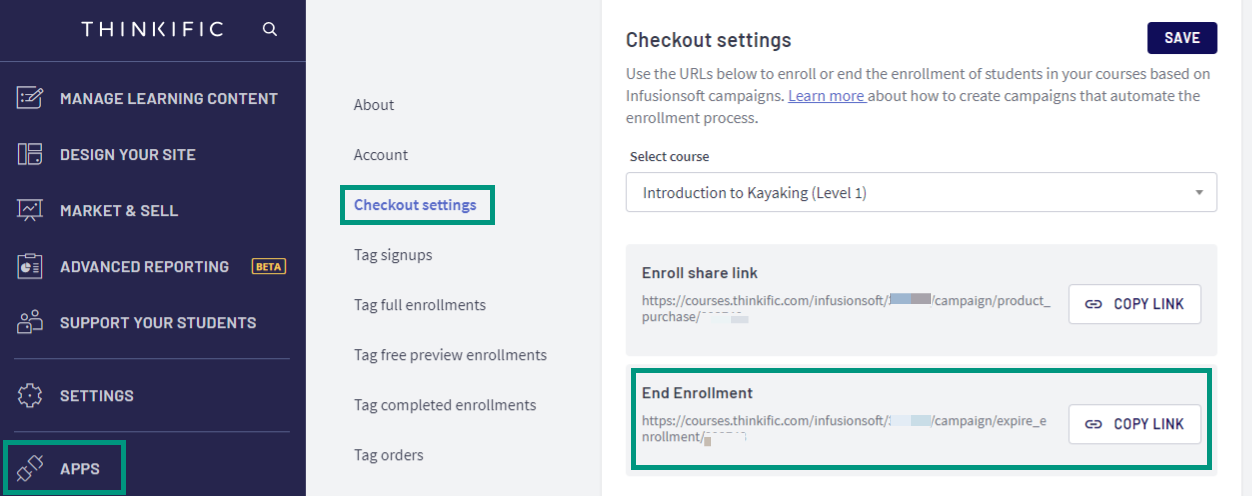
Copy-and-paste the URL into the POST URL field in Infusionsoft, and then click the Merge button.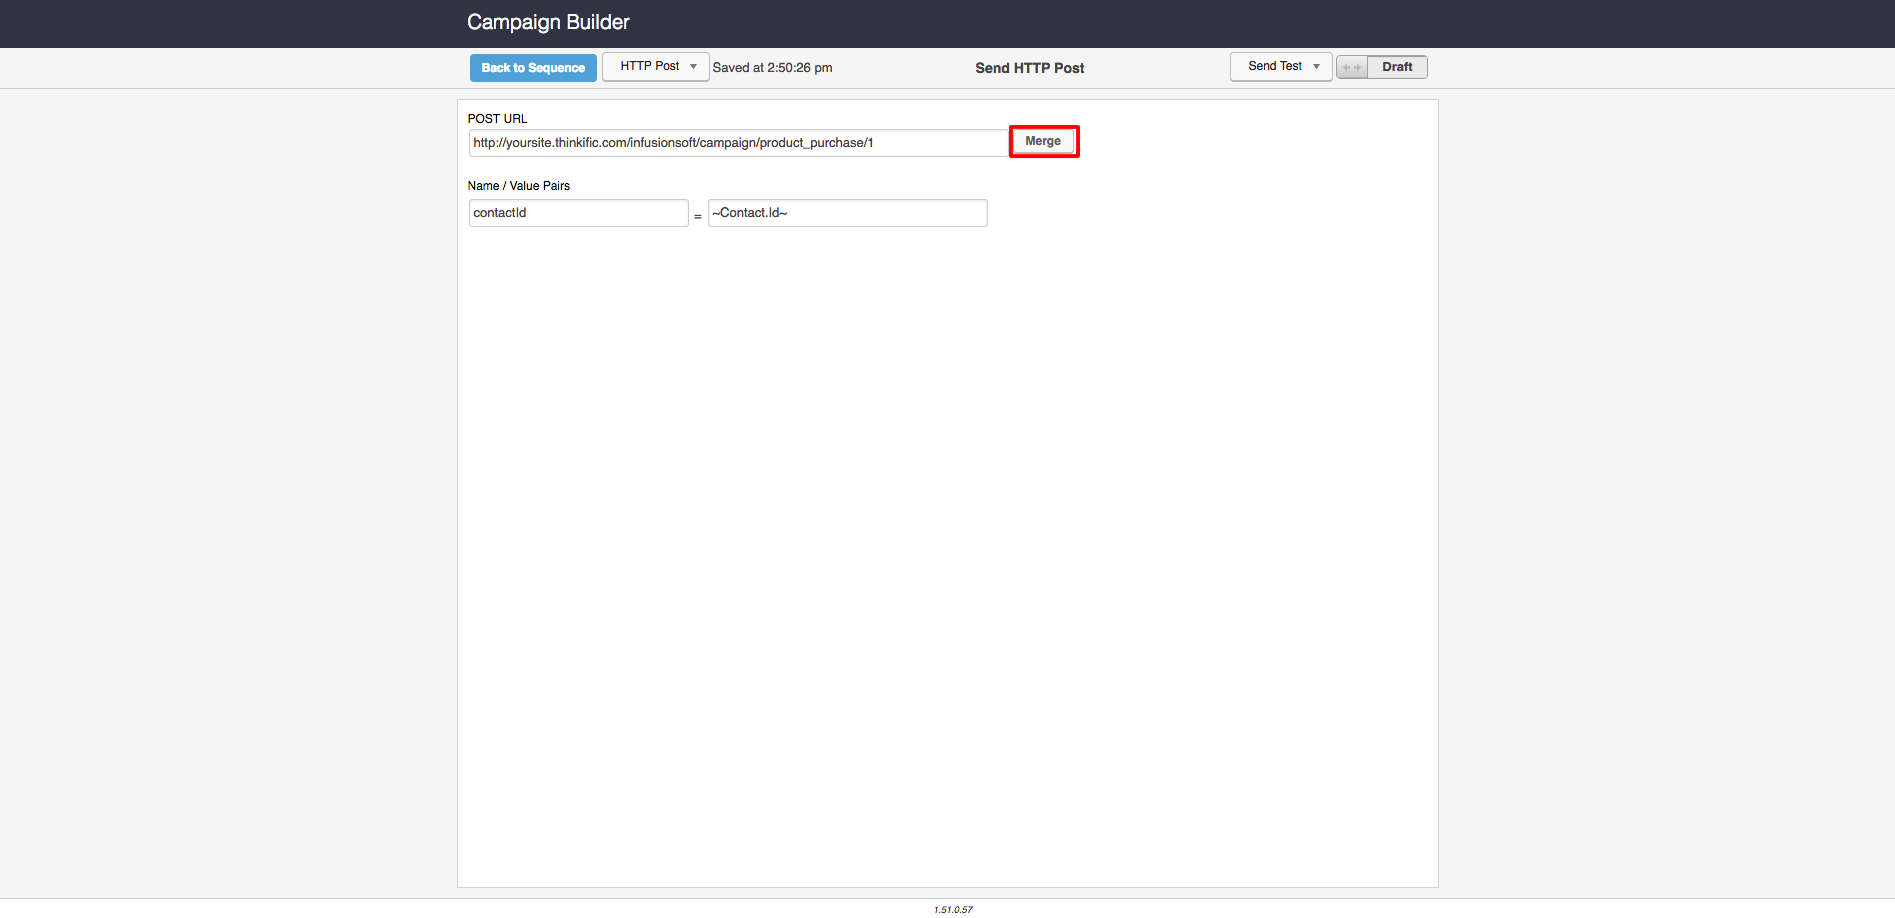
Merging the variables of Thinkific and Infusionsoft allows the user account and enrollment to be found in Thinkific following a failed payment, as shown below. The left-hand column is the name of the variable in Thinkific, and the right-hand column is the name of the variable in Infusionsoft.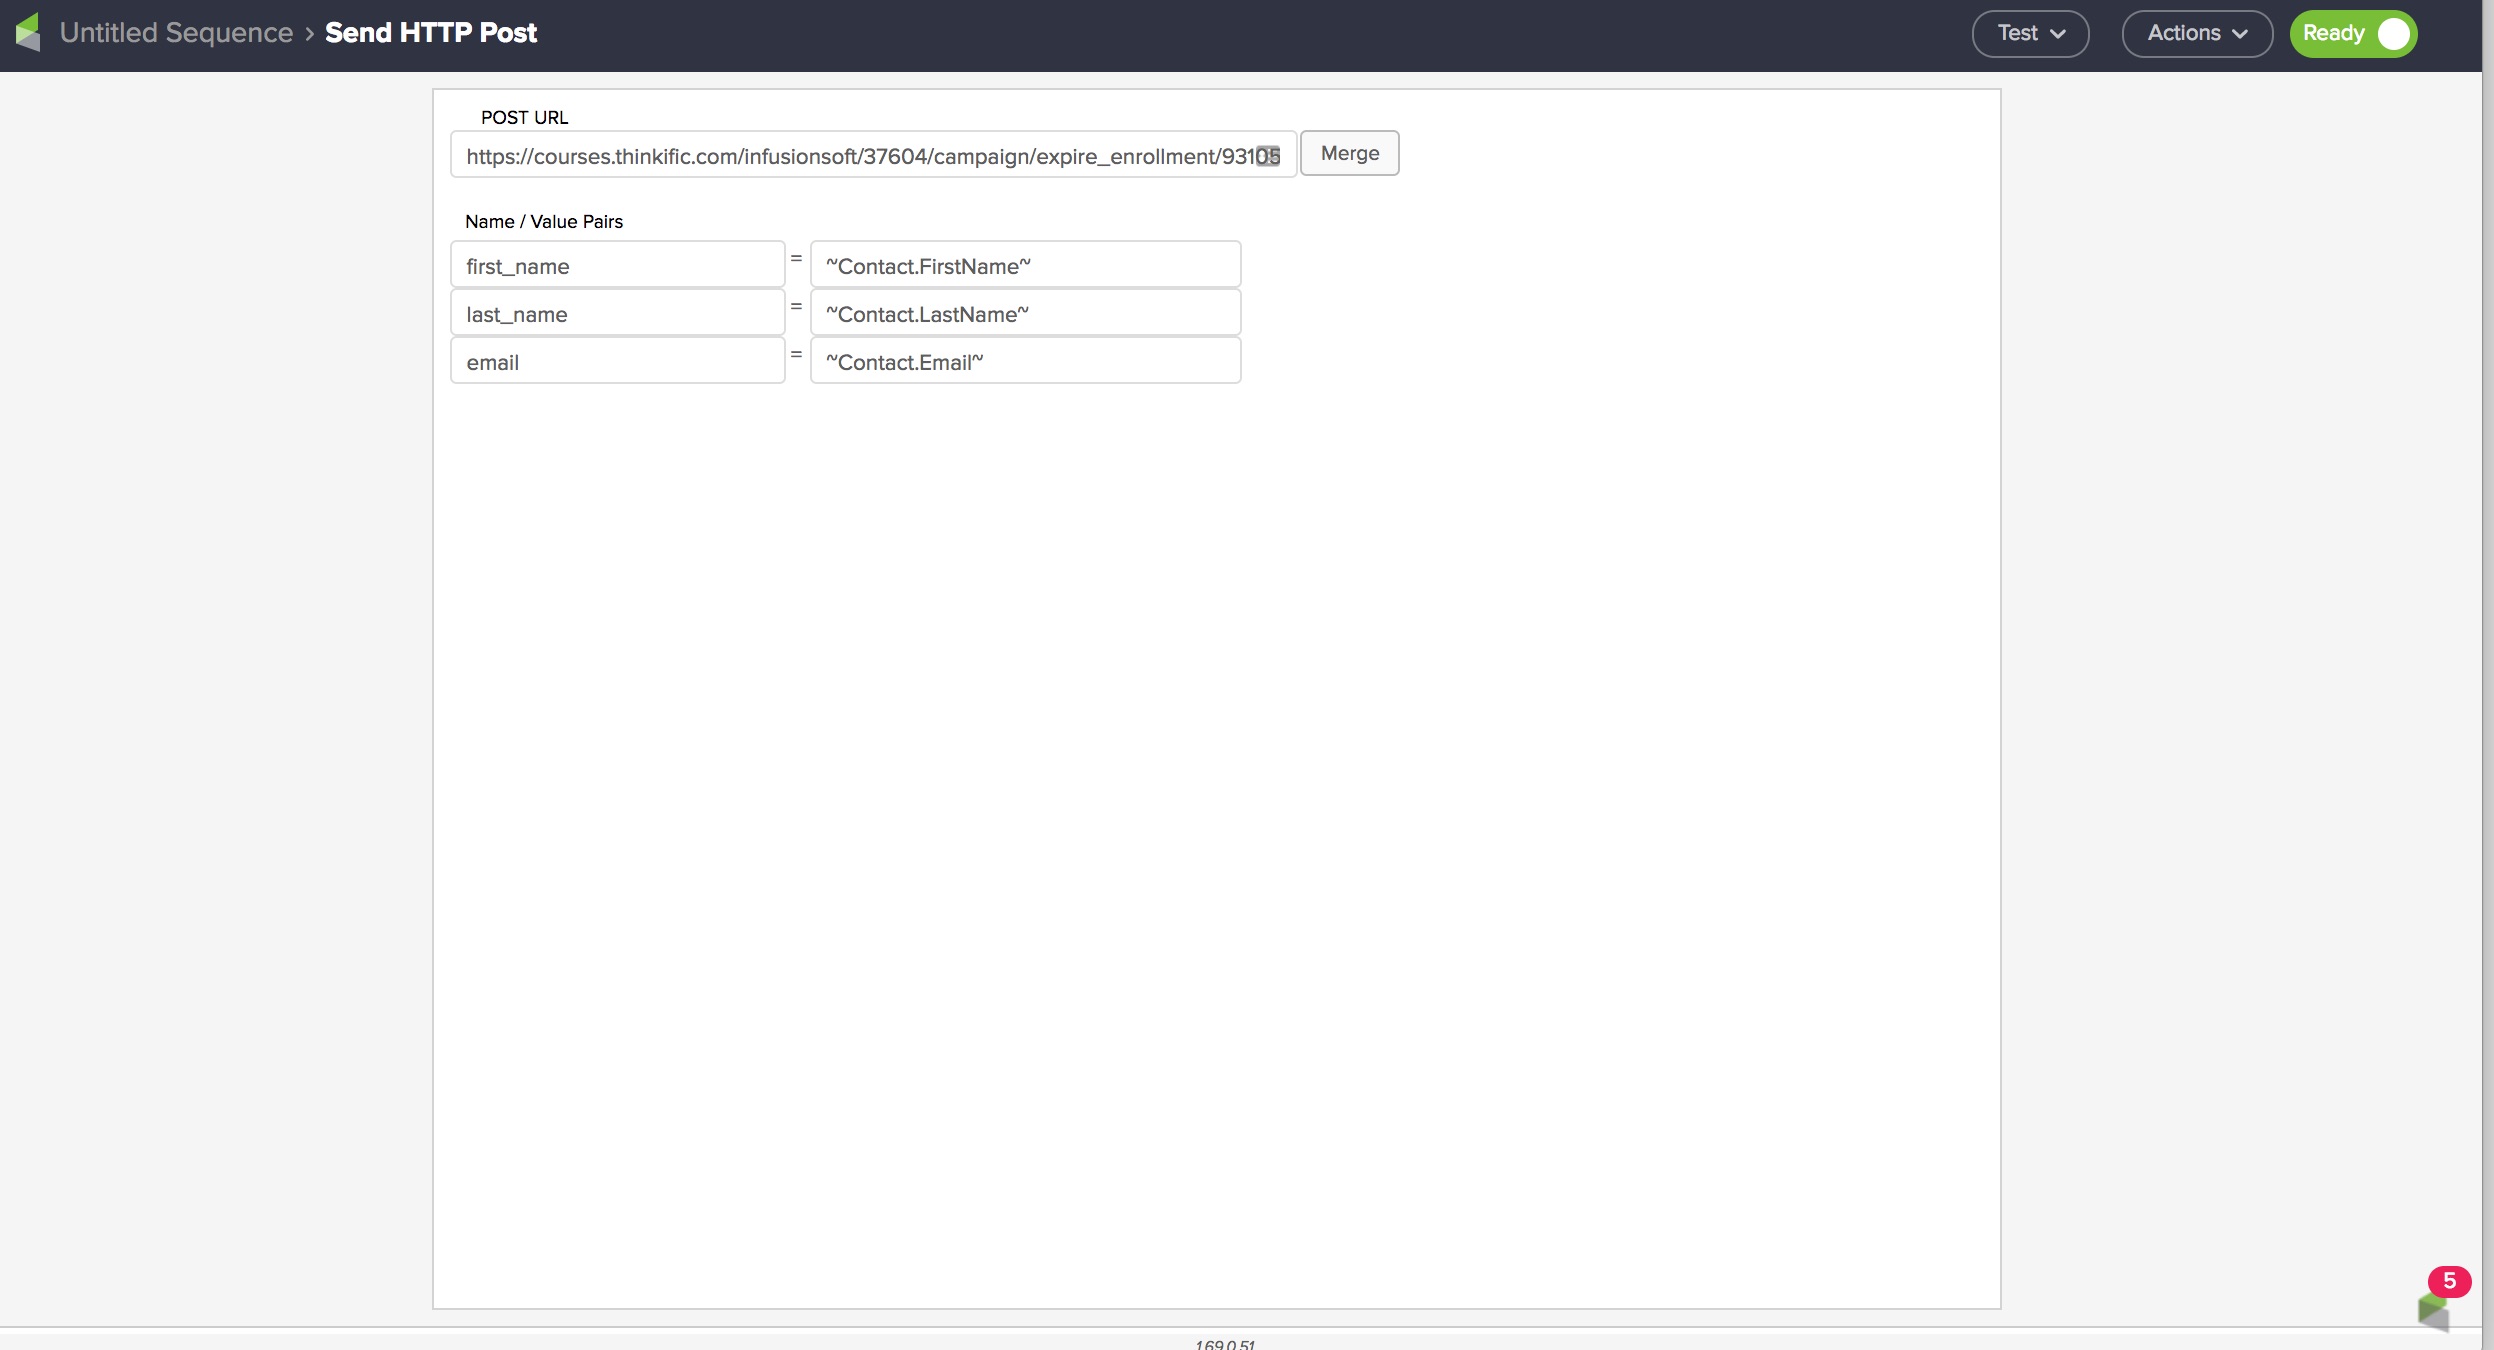
The list of the Thinkific variables to be typed into the left-hand column are listed below, along with the corresponding Infusionsoft variables that can be selected from the list of Merge Fields down the right side of the page. (You'll only need to do this once, as next time you can copy the variables from an existing campaign, as shown in the screenshot above). You'll only need to include the following three fields.
Required Name/ Value Pairs:
Thinkific Infusionsoft first_name ~Contact.FirstName~ last_name ~Contact.LastName~ email ~Contact.Email~
Then, set your sequence to Ready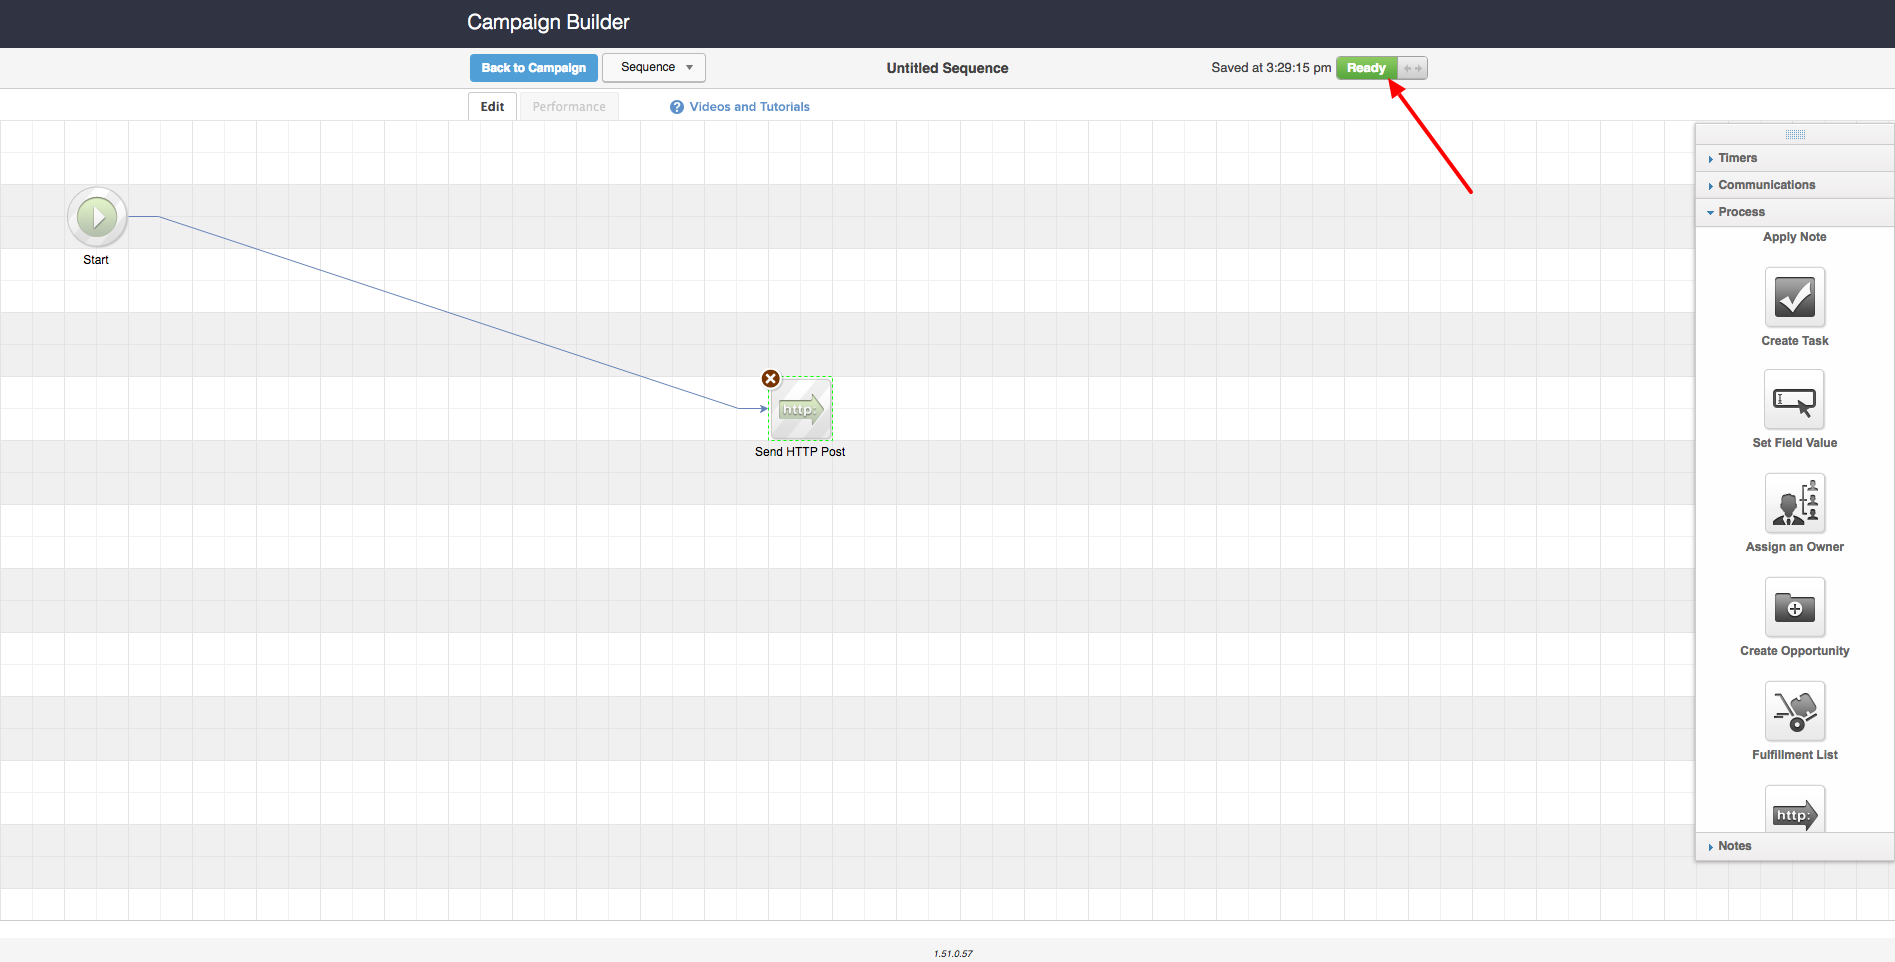
And that's it! When a student's payment fails based on the number of failures you've configured in Infusionsoft, the student's enrollment in Thinkific will be set to expire.
More About Infusionsoft
Infusionsoft (by Keap) App: Supported Features
Infusionsoft (by Keap) App: Tag Users
Infusionsoft (by Keap) App: How to Use the Express Sign In Link on Your Infusionsoft Thank You Page