Linking buy buttons to your checkout is the most common button you will set up on your site! This is how you will prompt visitors to purchase your products and continue through checkout.
How to Link a Button to a Specific Product Checkout
- Go to Design your Site
- Select Site Pages
- Select the page you would like to edit by clicking the pencil icon. This will open Site Builder
- Select Add a section, or locate your desired section in the left hand menu
- Click on the section name to view details
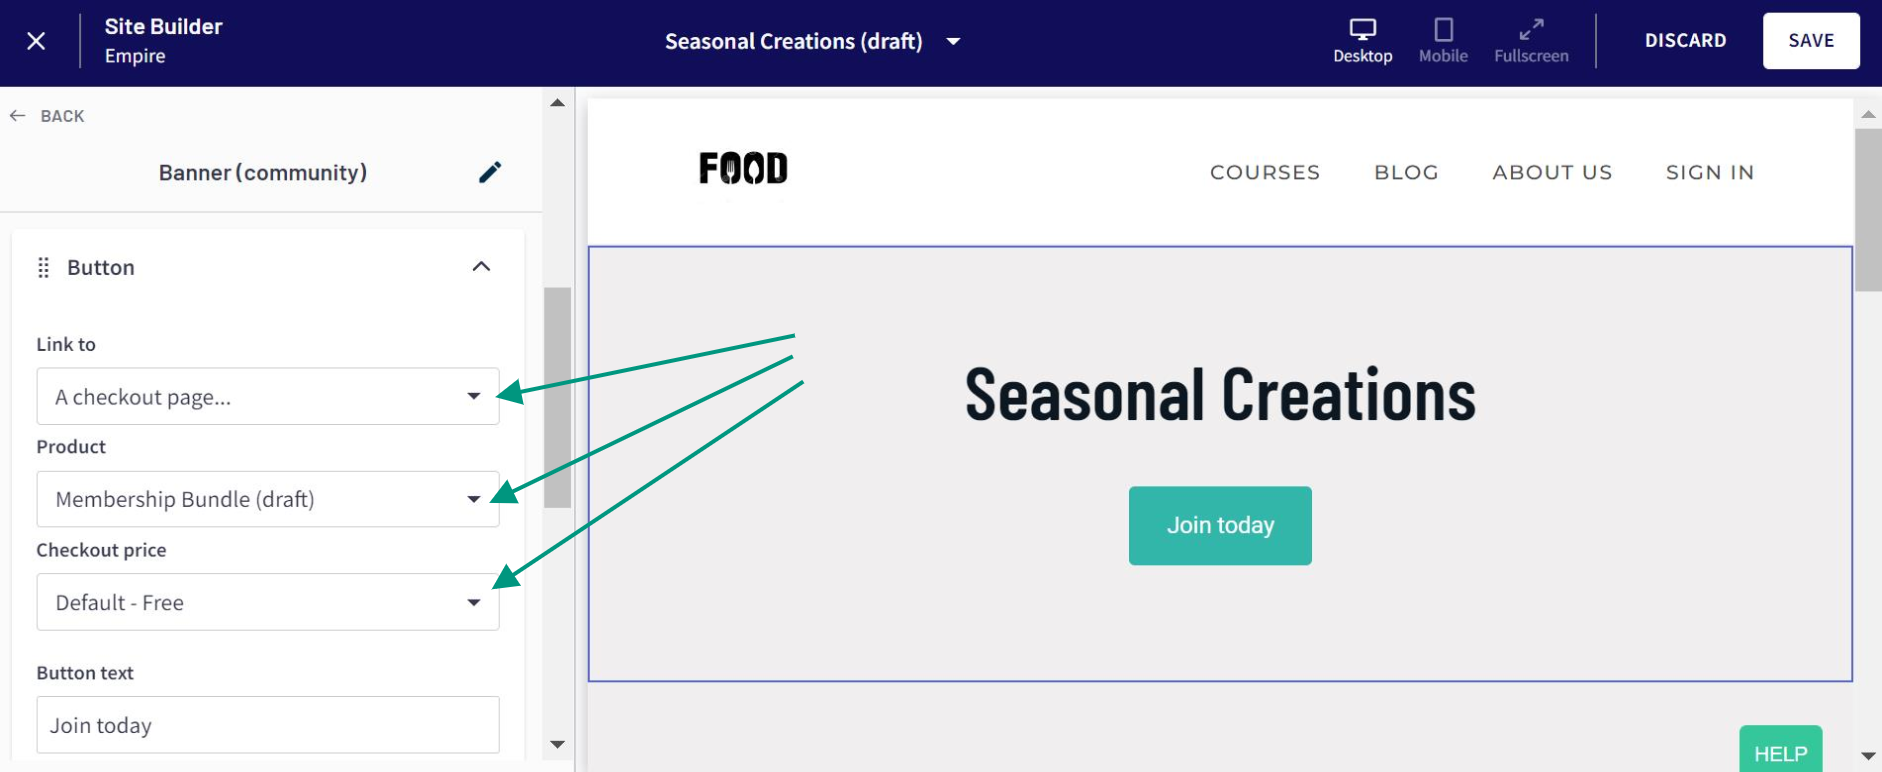
- Click on the Button block
- In the Link to field, select A checkout page...
- In the Product field, select your course, community, or bundle
- In the Checkout price field, select your desired price from the dropdown menu
If you do not have any additional pricing options for this course, it will select your primary price by default. - In the Button text field, input your desired button text
- Click Save
If you select the checkout for a product that is currently in draft state, the button will not direct your visitors to your checkout until the product is published. Clicking the button on your live site will simply refresh the current page. If you want to sell pre-sell your product, check out How to Create a Pre-Order Product!
Additional Customization
Depending on the Section you are editing, you will see some additional customization options for your button. Learn about that here: Site Builder Buttons
Testing Your Button
Once you have customized your button, we recommend testing it on your live site as your buttons will not function within Site Builder. The quickest way to start testing is to visit your site in another browser where you are not currently logged in or in a private window in your browser (e.g. Chrome's Incognito mode, or Firefox's Private Window).
If your product is not published yet, any buttons that are linked to checkout will go to a 404 page. They will go to the checkout as expected once you publish!